Create
Create a PolyNURBS face, create a PolyNURBS surface from a polyline, or extract a polyline from an existing NURBS or PolyNURBS object.
Create Face
Create a new PolyNURBS object from scratch, add new faces to an existing PolyNURBS object, or close a hole in an existing PolyNURBS object.
-
Click the Create Face icon.

Create Polyline
Create a surface by drawing a polyline and extruding it. This tool is useful for tracing a sketch to quickly create a PolyNURBS model from scratch.
-
Click the Create Polyline icon.

-
To enter edge editing mode:
- Press S.
- In the guide bar, click Edges
 .
.
-
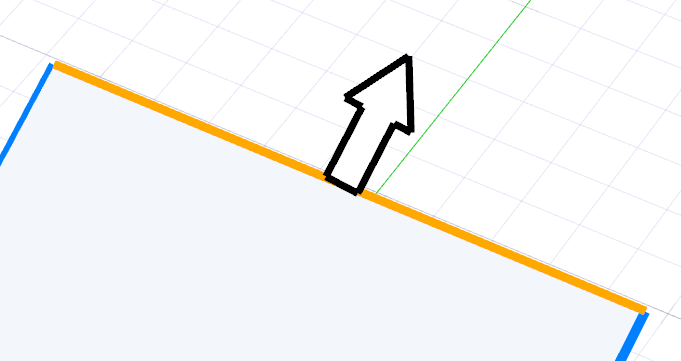
Extrude edges:
Note: You can extrude edges that are attached to a face on only one side; you cannot extrude interior edges.
- Select the edges you want to extrude.
- Do one of the following:
- To extrude freely, drag the arrow.
-
To extrude selected edges freely in the same direction, hold down Ctrl instead of Alt while dragging.
(When you extrude multiple edges, by default each edge is extruded along its own tangent direction to better maintain the PolyNURBS object's original shape. However, this may lead to undesired results, such as overlapping edges.)
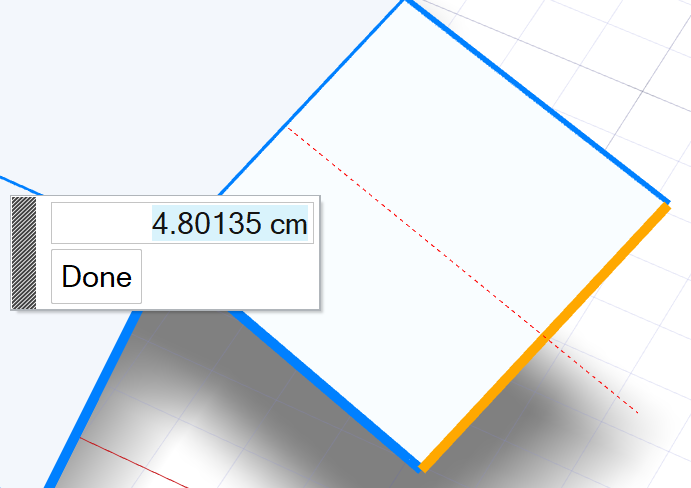
- To extrude perpendicular or parallel to the selected edge, hold
down Alt+Shift and drag. The dotted red
line indicates that you are snapping along the perpendicular or
parallel direction.
- To extrude freely, drag the arrow.
- Optional: Enter a precise length in the microdialog. Click Done.
Extract Polyline
In order to start creating a PolyNURBS object from a NURBS object, extract a polyline from an existing NURBS object .
-
Click the Extract Polyline icon.
