


|
Exporting to CSV, Microsoft Excel, Microsoft Access, Datawatch Designer, Qlik, and Tableau Files
Steps:
1. From the Prep Data window, select the table Join(1) (Data Processing + Compensation) and then click Export Data on the Prep Data toolbar.
A Select an Export Type dialog displays.
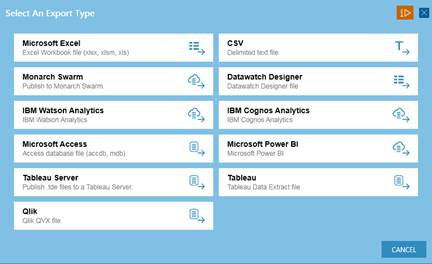
Figure 4-94. The Select an Export Type dialog of Data Prep Studio.
2. Select Microsoft Excel to display the Microsoft Excel Export dialog.
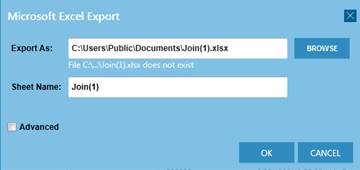
Figure 4-95. The Microsoft Excel Export dialog.
3. Use the Browse button to navigate to the folder into which you want to save your export.
Note that Data Prep Studio will remember the export file path that you use so that you do not have to enter or select this each time you export to the same file type.
4. Specify a filename to which your export should be saved.
5. Tick the Advanced button to specify how exports to an existing filename or table must be handled (i.e., append, overwrite, skip).
6. Select OK.
A message box indicating successful export appears.

Figure 4-96. The Export Complete message box.
7. Click OK to close this box.
When you export to a Datawatch Designer data source, the message box returned after completion of the export operation includes a link that will allow you to open Datawatch Designer and immediately use the exported table as a data source. Note that you must have Datawatch Designer installed to take advantage of this functionality.