


|
Filtering Data
You can choose how much data to import from a table into your Data Prep Session by filtering your table and selecting the data you want to view. Let’s find out how using the table we produced from a PDF report. In this example, instead of viewing data for 20 customers, we’ll select only 5 customers and load their data into a new table.
Steps:
1. Open Classic.pdf and then use the Auto-Define button in the Report Discovery window to extract data from the report.
2. View the resulting table in the Prep Data window.
3. Click the drop-down button beside the
Customer column and then select  Apply Filter.
The Apply Filter dialog displays.

Figure 4-78. The Apply Filter dialog.
4. Click
on the Select filter type  icon and, from the options that display,
select Multiple selection.
icon and, from the options that display,
select Multiple selection.
5. Under Value, select Betty’s Music Store, Big Shanty Music, Bluegrass Records, Canciones, and Chez Rudy.
6. Select Load Selected Tables when you are finished. The resulting table displays in the Prep Data window.
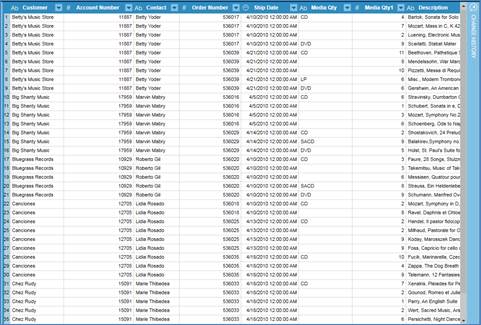
Figure 4-79. The table obtained from a filter operation.
Note that the data of only five customers are displayed.
Different filter operations are available for different field types. Numeric fields, for example, may be filtered by using ranges or specifying less than or greater than values. To filter date fields, you can specify a date range or before/after date. For text fields, you can specify strings or select discrete values.