


|
Working with Calculated Fields
The ability to create calculated fields is among the more important data prep operations you can perform. Calculated fields can be created from text, date/time, and numeric fields. They can also be edited via the Change History list.
A complete list of the functions available in the Create Calculated Field dialog, as well as their definitions and examples, may be found here.
Note, however, that Data Prep Studio does not support redaction functions. To use these functions on a table, switch to Classic mode, apply the necessary functions, and then open the table in Data Prep Studio.
For this exercise, let’s compute what the unit prices of various media from the Classic.pdf report would be if we applied a 10% discount to them.
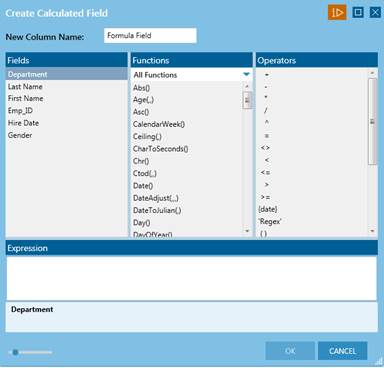
Figure 4-76. The Create Calculated Field dialog.
Steps:
1. From the Classic.pdf report, extract the fields marked by Betty’s Music Store (Customer), Bartok, Sonata for Solo Violin (Description), MK-42625 (Label/No.), and 8.99 (Unt_Prc). Load this table into the Prep Data window.
2. Click on the drop-down button beside the Unt_Prc column and then select Create Calculated Field.
3. In the Create Calculated Field dialog that displays, enter Discounted Prices in the New Column Name field.
4. Double-click on Unt_Prc field in the Fields panel so that the field name appears in the Expression box.
5. In the Operators panel, double-click on the multiplication operator. This operator appears in the Expression box.
6. Using your mouse, click to the right of the multiplication operator in the Expression box and then type in 0.90. Select OK when you are finished.
The Create Calculated Field dialog closes and a new column is added to your table.
7. Select the drop-down button of the Formula Field column and then click Format. In the Format Formula Field dialog that displays, select Financial and then click OK.
Your table is rebuilt as below.
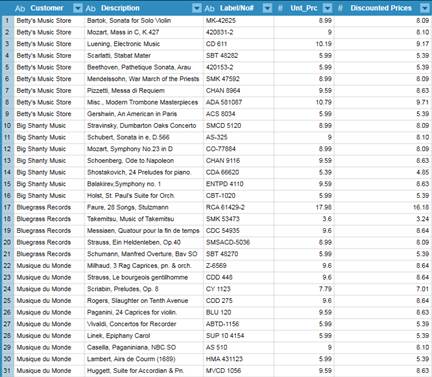
Figure 4-77. Adding a calculated field to a table.