


|
Connecting to OData
The following steps describe how to connect to a database via OData.
Steps:
1. From the Preview Data window of Data Prep Studio, select Add More Stuff.
2. In the Select Data Source to Open dialog that displays, select OData.
The Odata Connection dialog displays.
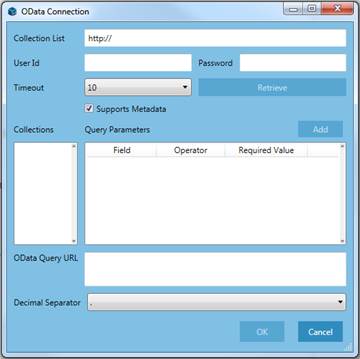
Figure 4-36. Initiating an OData connection.
3. Enter the collection list URL into the field provided.
4. Place your cursor in the User ID field and specify a user ID and password if necessary.
In the present example, we are using the Northwind database (http://services.odata.org/Northwind/Northwind.svc/), which requires no user ID or password.
5. Select Retrieve. A list of tables displays in the Collections box.
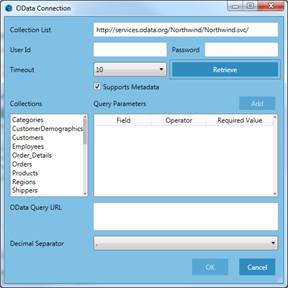
Figure 4-37. Selecting a collection (table) to open.
6. Select a collection (table) from the list provided and, in the adjacent Query Parameters box, select Add.
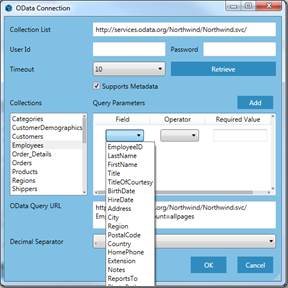
Figure 4-38. Selecting fields to open in Data Prep.
7. From the drop-down list that appears in the Query Parameters box, select fields to add to your table. You may filter results by specifying an operator and required (filter) value if you wish.
8. Continue clicking Add and repeating Step 7 until you are satisfied with your table.
9. Select your desired decimal separator for numerical values.
10. Click OK.
The table you created displays in the Preview Data window.
This table can be selected and loaded into the Prep Data window as usual.