


|
Using the Table Design Interface
Let’s name the rest of the fields this time using the Table Design View.
Steps:
1. From the Report interface, select the
Table tab to display the Table view and then click Autosize
Columns  .
This function resizes the columns of the table so that the contents
of each cell fit better.
.
This function resizes the columns of the table so that the contents
of each cell fit better.
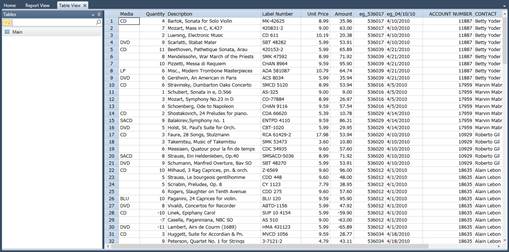
Figure 8-37. The table resulting from our templating activities is displayed when you select the Table tab.
2. Select Table Design  from the Table ribbon
to display the Table Design view.
from the Table ribbon
to display the Table Design view.
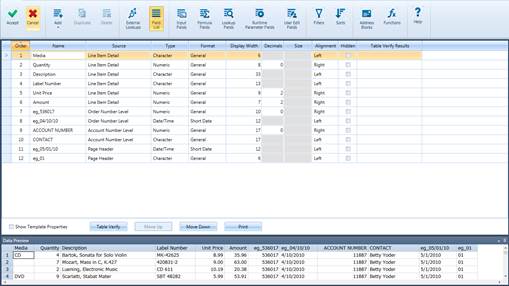
Figure 8-38. The Table Design interface displays names and properties for all fields.
The Table Design view presents a list of all of the fields you have trapped and will appear on your table, as well as their general properties.
If you wish to view the template properties, simply check the box labeled Show Template Properties at the lower left-hand corner of the view. You’ll also see the now-familiar Data Preview panel at the bottom left corner of the interface.
While the Table Design view allows you to change field names and properties similar to the Field Definition window, it also allows you to perform external lookups, specify formula fields, define filters and sorts, and define address blocks, among others. We’ll discuss these functionalities one by one in later lessons. For now, we’ll focus on changing field names using the Table Design window.
3. In the name field, locate the cell with the entry ACCOUNT NUMBER and change it to Account Number by clicking on the cell and typing over the original entry.
4. Locate the cell with the entry CONTACT and rename it toContact.
5. Replace the name eg_536017 with Order Number.
6. Replace the name 04/10/10 with Ship Date.
7. Replace the field name eg_05/01/10 with Report Date.
8. Replace the field name eg_Page 01 with Page Number.
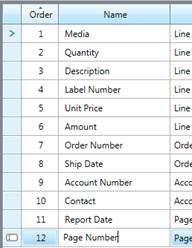
Figure 8-39. Renaming fields using the Table Design interface.
9. Click Accept  to
accept your field name definitions and close the Table Design view.
to
accept your field name definitions and close the Table Design view.
10. The Table Design interfaces closes and
you are returned to Table view. Click Autosize Columns
on the Table ribbon to view as
many of the fields as you can.
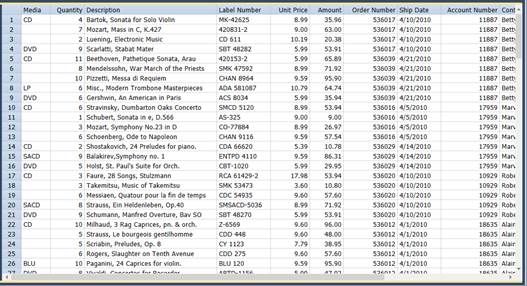
Figure 8-40. The results of our renaming activities.