


|
Getting to Know Report Design View
The Report
Design interface is our jumping-off point for creating data extraction
templates. It is accessed by selecting Report Design  from the Report ribbon.
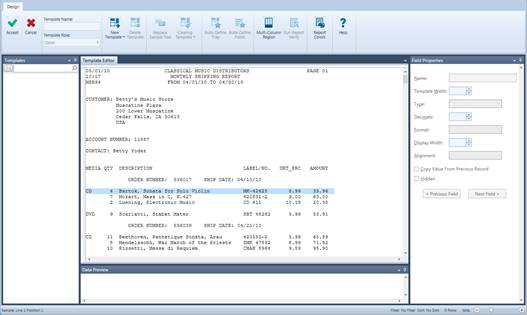
Figure 8-1. Launching the Report Design interface and Template Editor.
Let’s take a minute to explore what you can find in the Report Design interface.
The Report Design interface is divided into five distinct areas:
The Report Design ribbon is located on the top-most portion of the interface and spans the entire width of the screen. This ribbon will allow you to perform many of the report design functions made available by Monarch.
The Template Selector displays as a panel on the left-hand side of the interface. You can choose specific templates to view and modify from this selector, a functionality that is especially handy when you have defined multiple templates.
The Template Editor is displayed in the middle of the interface. The Template Editor remains disabled until you select a new template to create.
The right-hand side of the interface displays the general properties of a field in the Field Properties panel. Each field you define in a template has its own properties. You can set new properties or edit existing ones using this panel.
Below the Template Editor is a Data Preview panel. This panel automatically generates a preview of what your table will look like, including all of its content, while you build templates to extract the desired data from your report.
The figure below shows an example of what a Data Preview might contain:
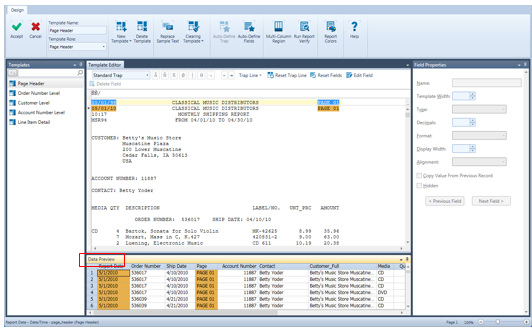
Figure 8-2. The Data Preview tab provides users with a tabular sample of their extracted data In this example, data from the Detail template are shown.
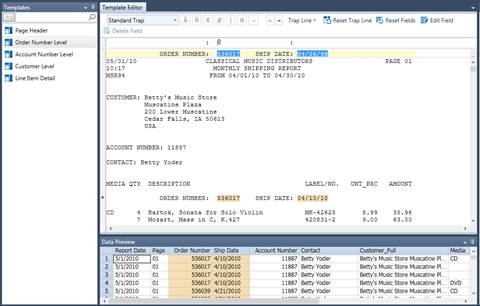
Figure 8-3. The Data Preview panel shows the data captured by the Order Number Level (append) template.
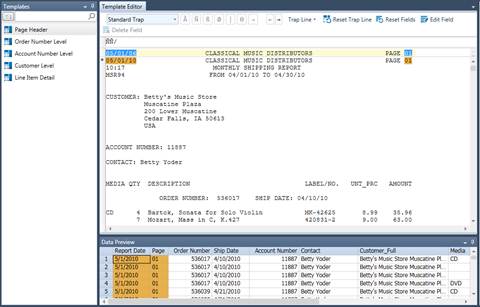
Figure 8-4. The DataPreview panel shows the data captured by the Page Header template.
The following table summarizes the functions of each of the buttons in the Report Design ribbon.
|
Use this button… |
To… |
|
|
Accept the new template or changes to an existing template |
|
|
Cancel the new template or changes to an existing template |
|
|
Specify a new template name or modify an existing one |
|
|
Display the role of the template selected |
|
|
Specify a new template |
|
|
Delete a template |
|
|
Select a new line in the report with which to base a template |
|
|
For footers and appends, remove “assumed” values copied up (for footers) or down (for appends) when only intermittent data are available. More information on this feature may be found here. |
|
|
Allow Monarch to automatically create traps for selected lines in the report |
|
|
Allow Monarch to automatically specify table fields based on selected lines in the report |
|
|
Specify multi-column region settings |
|
|
Verify that the boundaries of fields are properly defined |
|
|
Increase or decrease the size of the font displayed in the Template Editor |
|
|
Specify template colors |
|
|
Launch the Help file |

 Cancel
 Template Name
 Template Role
 New Template
 Delete Template
 Replace Sample Text
 Clearing Template
 Auto-Define Trap
 Auto-Define Fields
 Multi-Column Region
 Run Report Verify
 Zoom Control
 Help
Help