|
Deployment
Two steps are generally necessary to deploy Monarch in a Citrix environment:
-
Create a Machine Catalog
-
Create a Delivery Group
The following sections describe the details of each of these steps. In these sections, we assume that Monarch has been installed in a machine that is to be added to a machine catalog.
Creating a Machine Catalog
A machine catalog is a virtual or physical machine that can be assigned to a user to allow access to one or several applications.
Steps:
-
Login to the server where Citrix Studio or Citrix 7.6/7.8 has been installed. Log in as an Administrator and make sure you have administrative rights before proceeding.
-
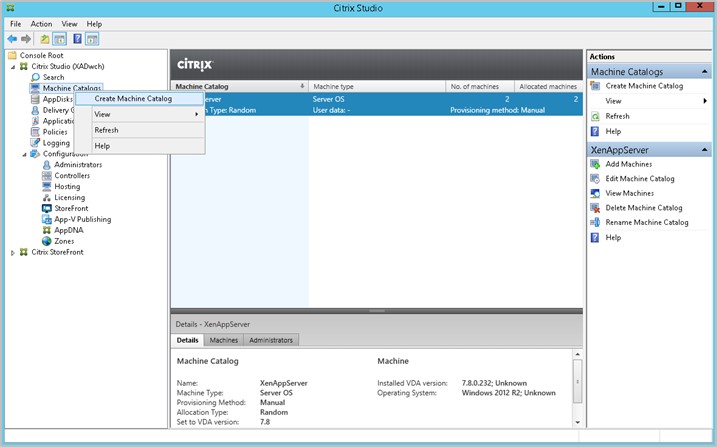
Right-click on Machine Catalogs in the tree on the left-hand pane and, from the menu that displays, select Create Machine Catalog.
-
Click Next on this Wizard.
From the Operating System options that display, select Server OS.

-
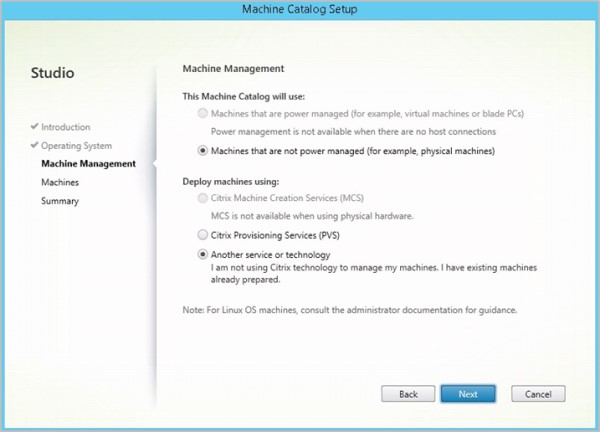
In the Machine Management screen that displays, select Another service or technology if the machine for which a catalog to be created is not managed by Citrix Provisioning Services or Machine Creation Services (e.g., a virtual machine). Click Next afterward.
-
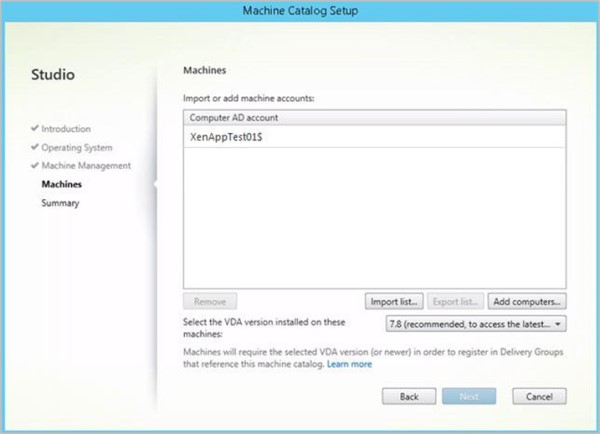
In the Machines screen that displays, click Add computers and, in the Select Computers dialog that displays, locate and select the Computer Active Directory account of Citrix Server. Click OK when you are finished. In the present example, DWCH\XenAppTest01$ is added as a machine account. This machine has Monarch installed in it.
-
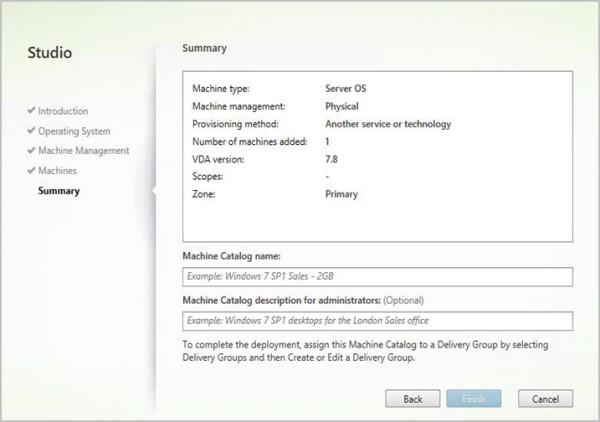
Select Next. The Catalog is now created. Give an appropriate name to this Catalog.
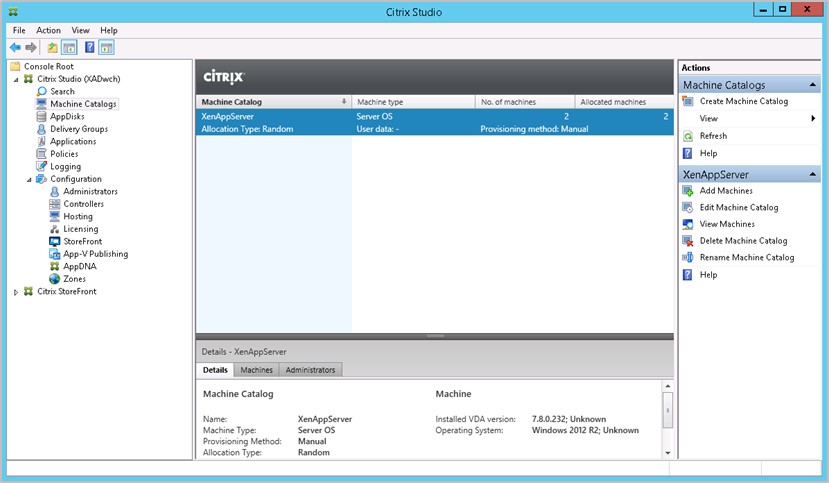
Once your catalog has been created, you can select it to view its properties.
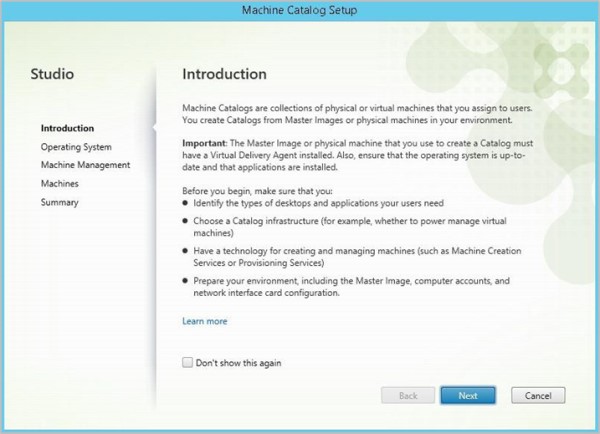
The Machine Catalog Setup Wizard displays.
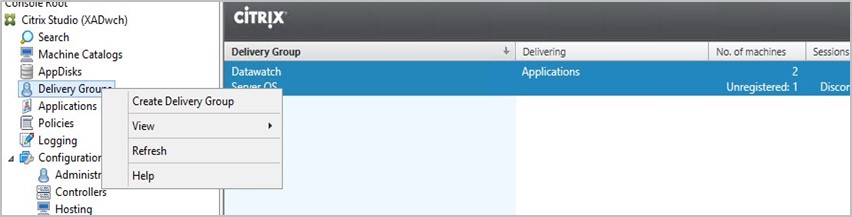
Creating a Delivery Group
A delivery group is a collection of machines selected from one or more machine catalogs. Delivery groups specify which users can use those machines, and the applications available to those users.
Steps:
-
From the tree on the left-hand page of Citrix Studio, right-click on Delivery Groups and, from the menu that displays, select Create Delivery Group.
-
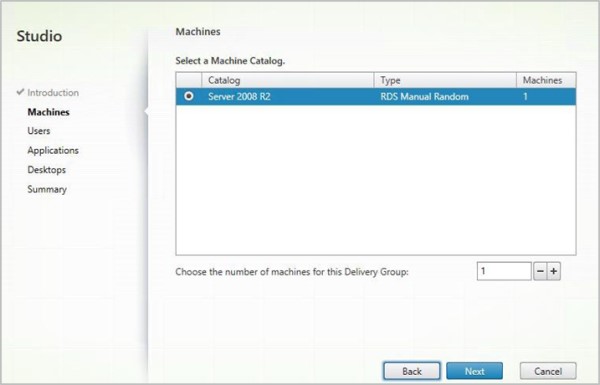
The Create Delivery Group Wizard displays. In the Machines screen, select the catalog you created and specify the number of machines to add to the delivery group. Note that you can add several machine catalogs to a delivery group but a machine catalog can only be assigned to one delivery group. Click Next when you are finished.
-
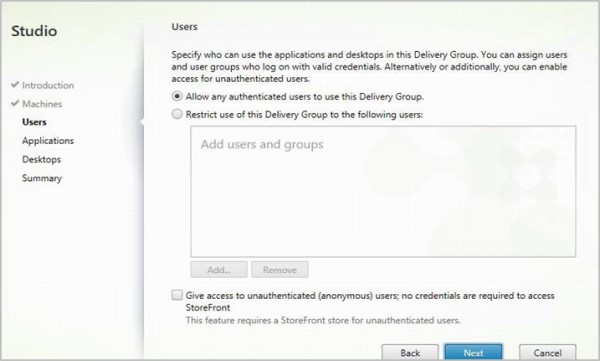
In the Users screen, specify the users allowed to access to the applications installed in the machines added to your delivery group. You can publish applications to all of the users in your domain if you wish. Click Next when you are finished.
-
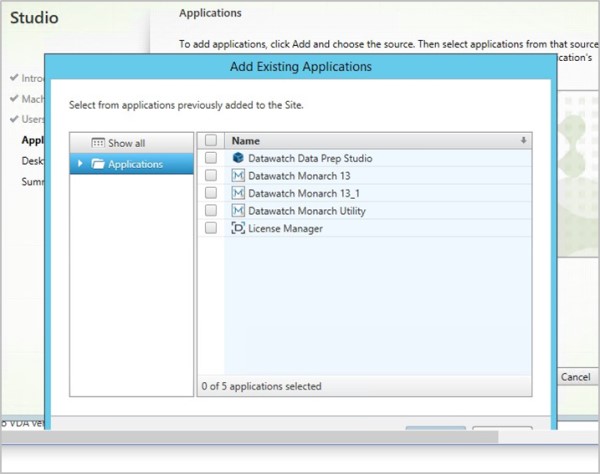
In the Applications screen that displays, select Add > Existing.
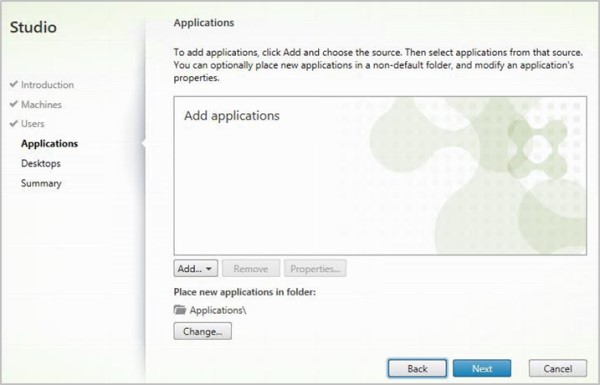
The Add Existing Applications dialog launches.
-
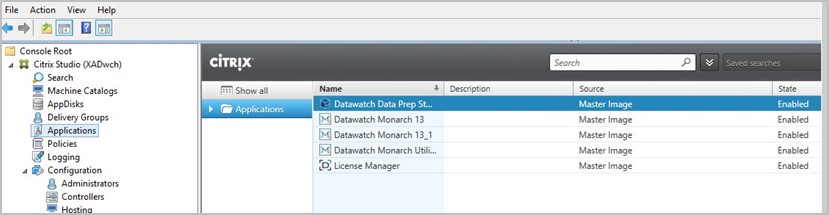
Check the boxes for the applications you wish to add (e.g., Monarch Data Prep Studio, Altair Monarch, License Manager, and Monarch Utility) and then click OK when you are finished. The list of applications should be automatically pre-populated by Citrix studio.
-
Click Next on the Desktops screen.
-
In the Summary screen, provide a name for the newly defined delivery group. You may also add a description of this group if you wish. Select Finish when you are done.
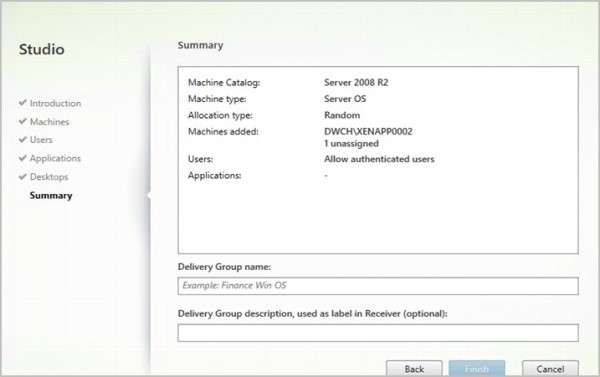
Your newly added delivery group is created; this group will display in the Delivery Groups list.
The Applications list will show a set of published applications, including Monarch.