


|
Verifying Field Boundaries
When you perform a verify operation, Monarch Data Prep Studio scans the entire report to ensure that all fields are painted in the correct location and of the correct length and data type. If any non-blank characters are found immediately adjacent to a field boundary, Monarch Data Prep Studio will alert you that the field may be too short or defined at the wrong location. Then you can decide whether the field is correctly defined or needs to be redefined.
The Report Verify window displays the status of a verify operation. If the verify operation detects a field boundary error, the Report Verify window allows you to correct the error and then continue with the verify operation.
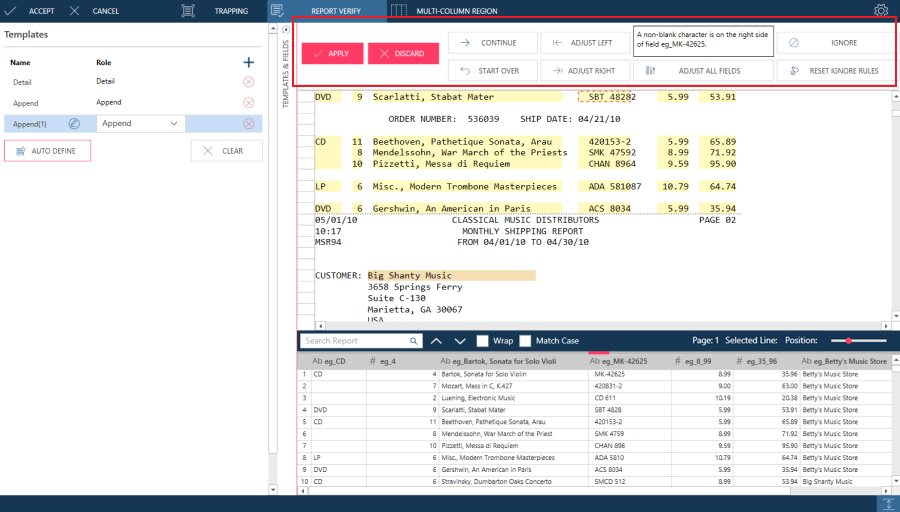
If the verify operation detects a right field boundary error, the verify operation is halted and the Report Verify window displays a message that describes the boundary error, e.g., "A non-blank character is on the right side of field eg_". The line in the report where the field boundary error occurs is highlighted. The Report Verify window also displays Adjust Right and Adjust Left buttons. Pressing Adjust Right adjusts the problematic field by one character on its right side. Pressing Adjust Left moves the field by one character on its left side. Note that Report Verify will not call out a right-boundary issue on the first field if two fields are adjacent to each other but the second field is preceded by a blank character. If a space is consistently located at the end of a captured field and a character follows it, Report Verify accepts the boundary as valid.
When using the Adjust Right or Adjust Left buttons, the results of expanding or shrinking are immediately reflected in the Template Editor. The Adjust Right or Adjust Left buttons are grayed as necessary so that a field cannot be shrunk to zero width or expanded to the point where it overlaps another field from the same template.
Steps:
-
In the Report Design window, select the Report Verify tab.
-
Click the Adjust Right or Adjust Left buttons in the Report Verify window to increase or decrease the highlighted field. Each click of the Adjust Right or Adjust Left button increases or decreases the field by one space. The Report window immediately displays the changes to the field. You can also click Adjust All Fields to adjust all fields automatically. You can also ignore the issue by selecting Ignore All. In this case, similar issues for the same field are ignored.
-
When you have finished editing the field, click the Continue button to see if any additional fields need editing. You can also opt to Start Over.
-
Click Reset Ignore Rules if you wish to include all previously ignored issues in the next iteration of report verification.
-
Click Accept to save all of the changes you have applied or Cancel to terminate the verify operation.
If Monarch Data Prep Studio finds a field with characters adjacent to its boundaries, it will stop and highlight the field. You must then decide if the field should be redefined to include the adjacent characters. Field boundary problems may be corrected immediately.
Note:
The verify operation also detects data type failures. A data type failure can occur when, for example, a numeric field cannot be converted to a valid number or when a date field cannot be converted to a valid date. For example, if you defined a field called "Media" and assigned the field type "Numeric" to it, when the verify operation finds a Media field in the report that contains text rather than a number, it would display the following message: "Text for field Media cannot be converted into a valid number." To correct a data type failure, close the Verify window, and then make the necessary edits to the field (i.e., specify a different field type via the Field Properties panel).