|
Using the Floating Trap
In many reports particular fields of data, such as names and addresses, occur in consistent locations (i.e., they begin at the same horizontal position throughout the report). For example, in the illustration below, note how all of the customer names begin at the same horizontal position in the report, as do all of the account numbers and street names.
A report showing consistent data placement, as is typical of many reports.
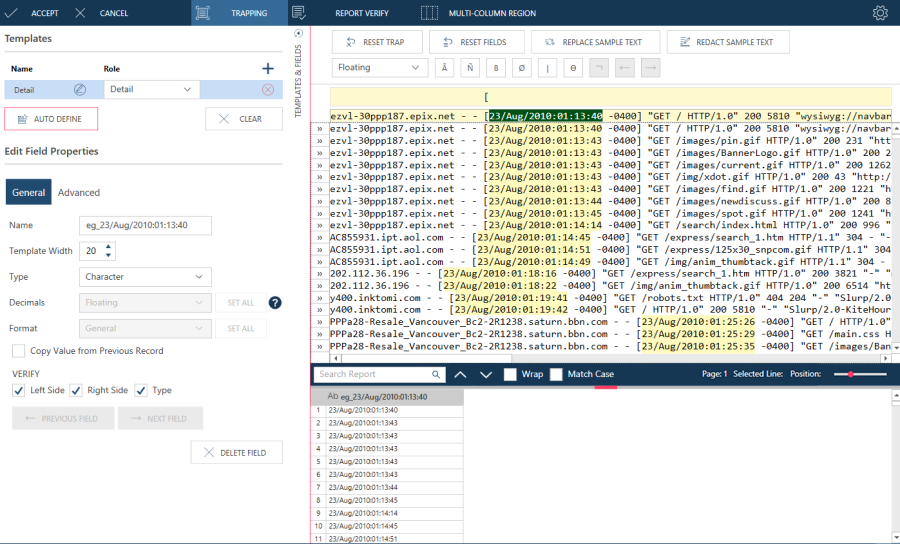
Due to the consistent placement of data within the report, defining a trap to capture each occurrence of any one of these fields would be quite easy. With some reports, however, a standard trap won't work because data placement within them is irregular rather than consistent. In the report below, for example, note how the date/time fields (e.g., 23/Aug/2008:...) begin at different horizontal positions.

A report showing inconsistent placement of the date/time data.
In reports such as this, a standard trap will not work. Fortunately, Monarch Data Prep Studio includes a special trap called the floating trap, which can successfully extract data from many log files, reports and HTML files in which the data placement is not rigidly fixed.
When using the floating trap, the following may affect the size of extracted fields:
-
A template's width serves as the maximum field length that can be extracted.
-
The occurrence of the next trap character will truncate a field.
-
The beginning of a new field will truncate a field.
When you switch from a standard trap to a floating trap, you may no longer do the following:
-
Use variable (i.e., multiple line) fields: Variable fields are not allowed on a trap line that contains a floating trap. The Advanced tab is disabled in the dialog.
When you change from a floating to a fixed trap, the following may happen:
-
The template width of some fields will be shortened.
-
The Postal trap button becomes enabled.
Note: If you are not already familiar with the template creation process, we recommend you read Creating a Template before going any further.
Steps:
-
Launch the Report Design window.
-
Select a line in the report for which you wish to create a trap.
-
Click the Add a New Template
 icon in the Template and
Field Properties panel of the Report Design window and then select
an appropriate template role for the template you wish to create.
icon in the Template and
Field Properties panel of the Report Design window and then select
an appropriate template role for the template you wish to create. -
Select Floating Trap from the Trap Type drop-down and then scroll down the report.
-
Click in the Trap box to position the cursor above a letter, number, space or punctuation character that you want to include in the trap, then type the character or click the trap button that represents the character. If necessary, use the cursor keys or the horizontal scroll bar at the bottom of the Report window to scroll the trap line and the template sample left or right.
-
Using the sample line as an example, highlight the field(s) you want to extract. Each field highlight should be long enough to allow for long field values but not so long that you extend the highlight into another field's data. For numeric fields, which are right-aligned, the highlight should extend to the left to account for the largest number that is likely to exist in the field.
-
View enough of the report to satisfy yourself that the floating trap captured all instances of the detail lines. If the floating trap missed any lines, inspect those lines to determine what modifications you need to make to the trap in order to capture them. After making your modifications, preview the template once again.
-
If you are happy with the results of your trapping, modify the field name to make it more representative of the data it contains and then click the Accept button.