


|
Mapping Columns
In a data prep session, you may perform changes on a table (Table A) that you'd like to apply to another table (Table B). An easy way to do this might be to simply open Table B in Data Prep Studio and copy Table A's change history to it via drag and drop.
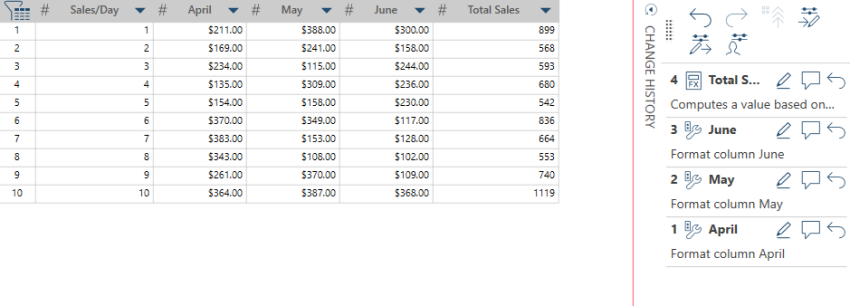
In the following example, Table A includes a record of daily sales for the first quarter of the year. In this table, the column names Sales/Day, January, February, March and April are used. The column Total Sales is generated by summing daily sales for these months.
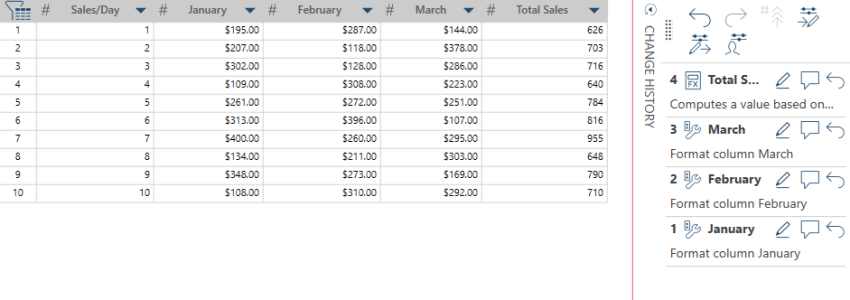
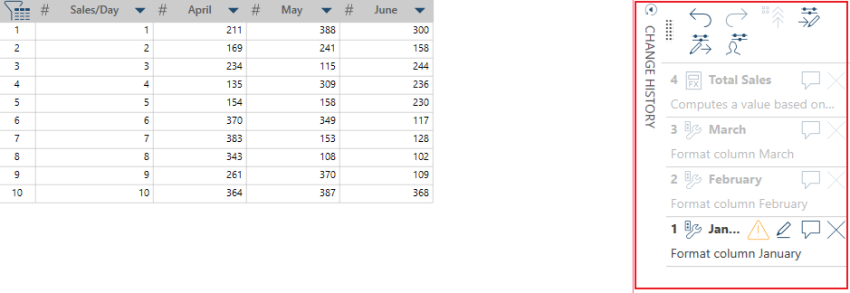
Table B below contains the exact same details in Table A, but its months include April, May and June. Because changes are made primarily based on column names, changes made to Table A will not be applicable to Table B, even if everything else about the tables is identical.
Data Prep Studio addresses this problem by allowing you to map the columns of Table B to those of Table A, in effect telling the application that "Column 1 in Table A corresponds to column X in Table B, column 2 in Table A corresponds to column Y in Table B, and so on." You can map columns manually, automatically by name, or automatically by order.
Mapping columns manually
Steps:
-
Assuming you have a Table A to which changes have been made open in Data Prep Studio, right-click on this table and then select Edit File Path from the options that display.
-
Use the Edit File Path dialog to navigate to and select the data source for Table B.
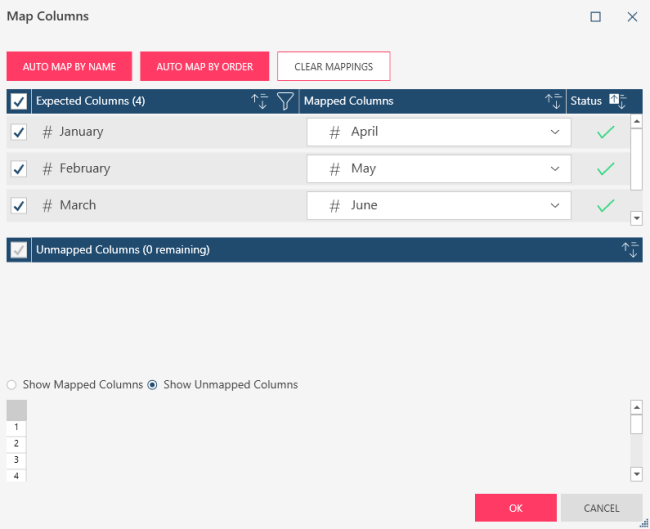
The Map Columns dialog displays.
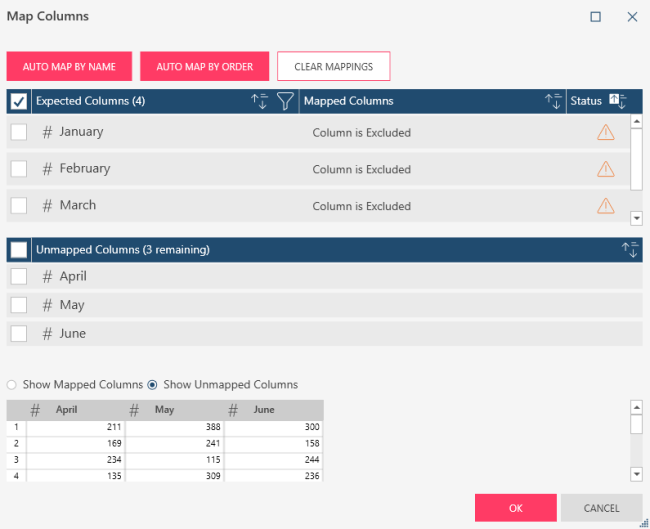
The upper section of the dialog describes the columns expected in the input schema (Table A), while the lower section describes the columns available in Table B. You can also opt to view successfully mapped columns or unmapped columns in a preview located below these sections.
-
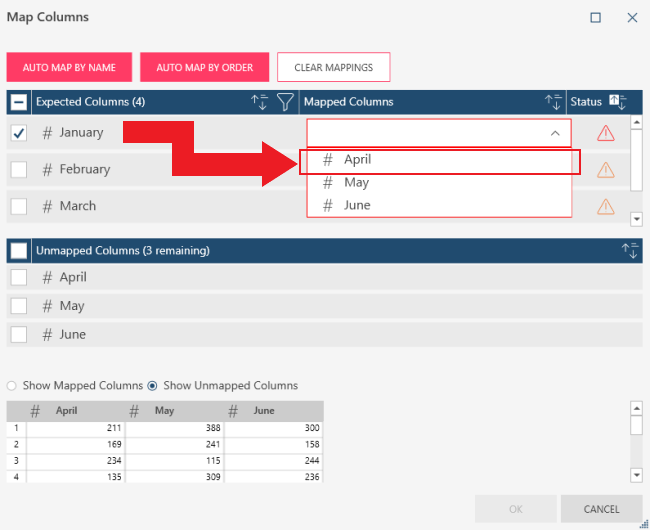
In the upper section of the dialog, select a column in Table A to map to another column in Table B. Doing so activates the adjacent field below Mapped Columns. Click on the drop-down button that displays to select a column in Table B for mapping.
-
Do the same for the rest of the columns requiring mapping. Table B is successfully mapped to Table A if green check marks display for all header names in the Status column.
Note that the lower section of the dialog as well as the preview shown when the radio button Show Unmapped Columns are emptied.
-
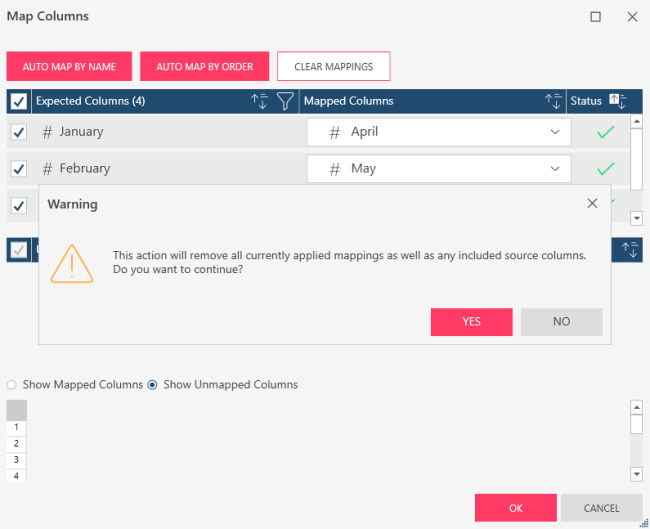
If you wish to clear all mappings defined and start over, click the Clear Mappings button and then click Yes in the pop up that displays.
-
Click OK when you are finished.
The change history from Table A is correctly applied to the contents of Table B.
Mapping columns automatically
You can map columns automatically by name or by order. To do so, click on the corresponding button in the Map Columns dialog.
-
If Auto Map by Name is selected, Data Prep Studio maps all columns in Table A to all columns in Table B for which a matching name is found.
-
If Auto Map by Order is selected, Data Prep Studio maps all columns in Table A to columns in Table B in order of the data types found.
Note that if you select either of these options, all previous mapping definitions are discarded.