


|
The Template Definition Wizard (Guide Me)
The Template Definition Wizard guide you through the steps of defining templates.
Steps:
-
Open your Excel file in one of two ways:
-
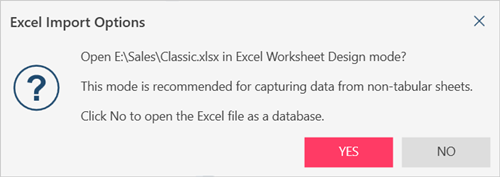
Drag the Excel worksheet into Monarch Data Prep Studio and select Yes when the Excel Import Options dialog displays:
-
Go to Open Data > Spreadsheet > Excel Worksheet Design
-
-
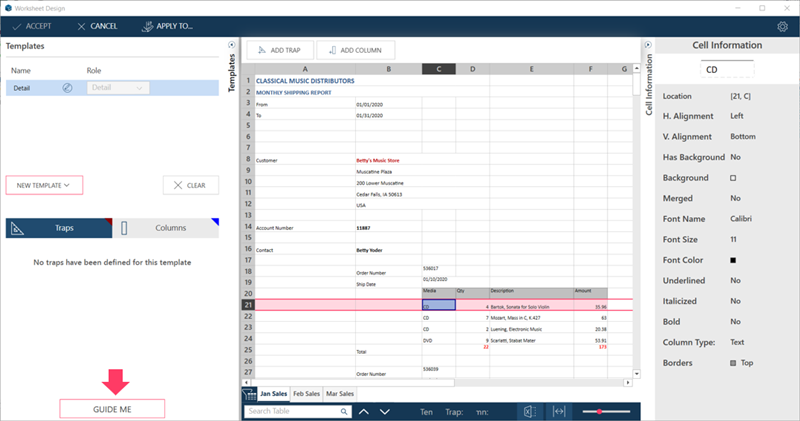
Select Guide Me at the bottom of the Templates panel:
-
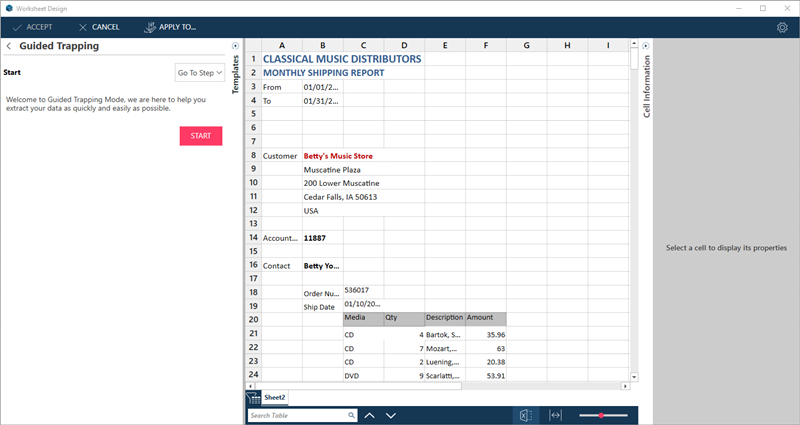
Select Start. You are asked to select a detail row:
-
Select a detail row and then select Confirm Row.
-
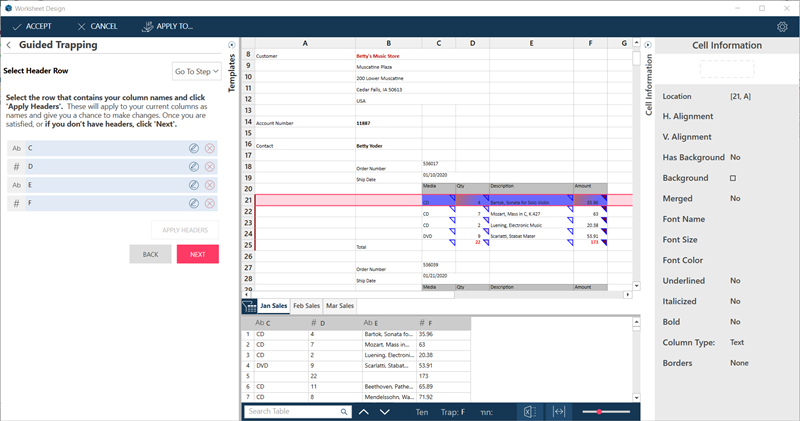
The Wizard automatically identifies the columns on the row you selected as trappable columns, and traps these. This is signified by the solid triangles at the top-right corner of the columns.
-
The Wizard traps all columns in rows similar to the detail row you selected.
-
Samples of trapped data are displayed on the preview grid (the panel below the worksheet).
-
Traps that have been defined are displayed on the Guided Trapping panel. For now the traps are named after the columns in which the columns are located.
-
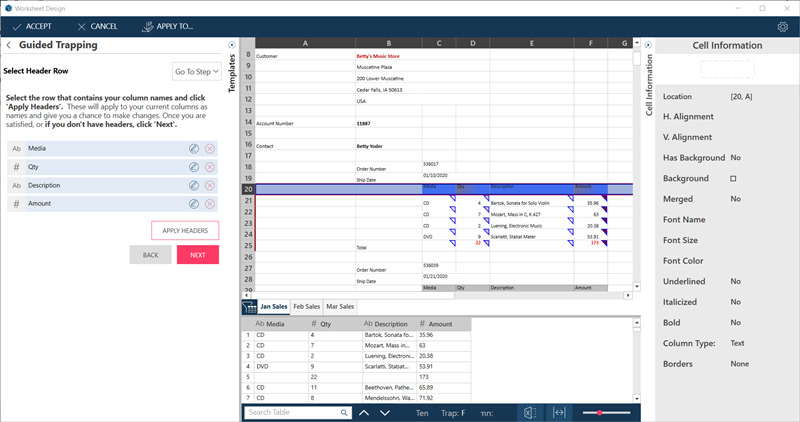
This step should be easy: if your details have a header, select the row showing the headers and then select Apply Headers. If there are no headers, select Continue.
-
Verify detail columns.
-
In this step, you are asked to verify detail rows.
-
Select Assisted Verify to have the Wizard do the adjustment for you:
-
Select Manual Verify to do the trap adjustments yourself.
-
Cell value rules
-
Font properties
-
Alignment Properties, and
-
Cell Properties.
-
Define your Appends.
-
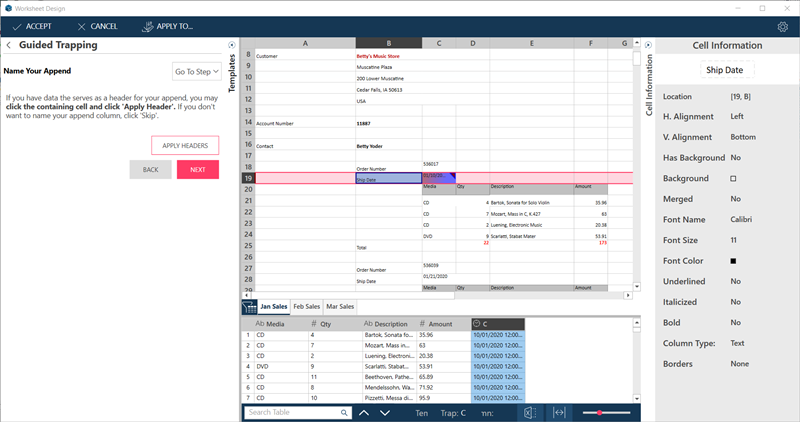
Select header values and select Apply Headers.
-
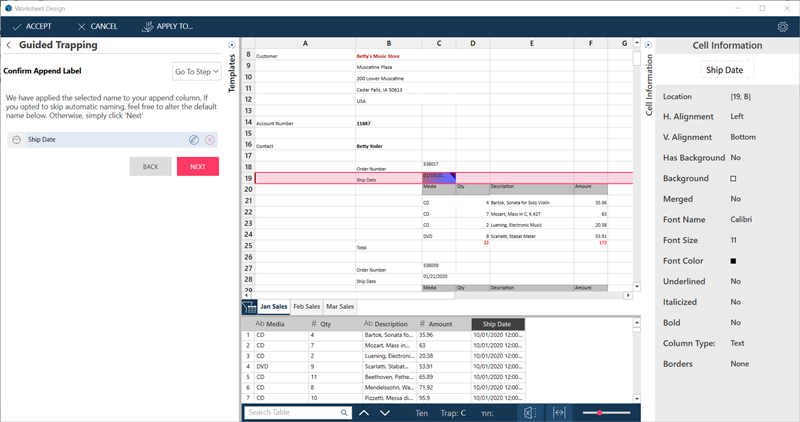
Confirm the Append Label and select Next.
-
Select Manual or Assisted.
-
Select Yes to add more Append columns.
The Guided Trapping interface overlays the Templates panel:
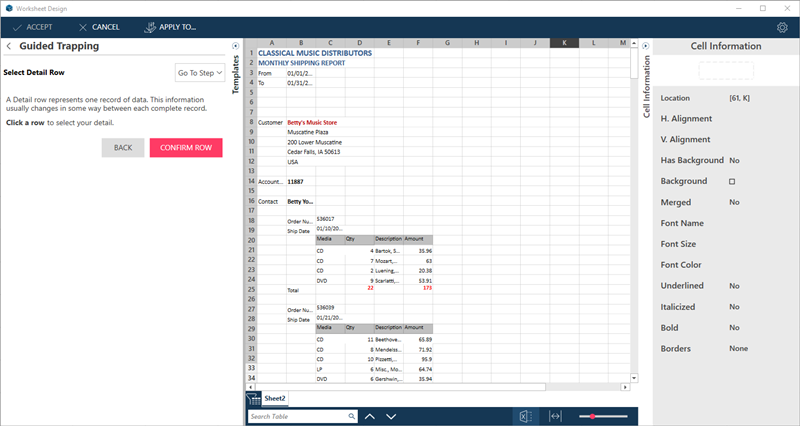
Note that in this step, the Wizard is helping you with the first major requirement in creating templates: define the detail template first.
What you need to do is look for the lowest level of repeating rows, the detail rows in reporting language. If you are not familiar with the worksheet, you may need to scroll down to determine this.
Several things happen at this point:
Your screen should look similar to this:
You are next asked to identify the header row.
If you selected headers, these are applied. They are reflected on the preview grid as well as on the list of traps:
If you are satisfied with the result, select Continue. You are next asked to verify the columns:
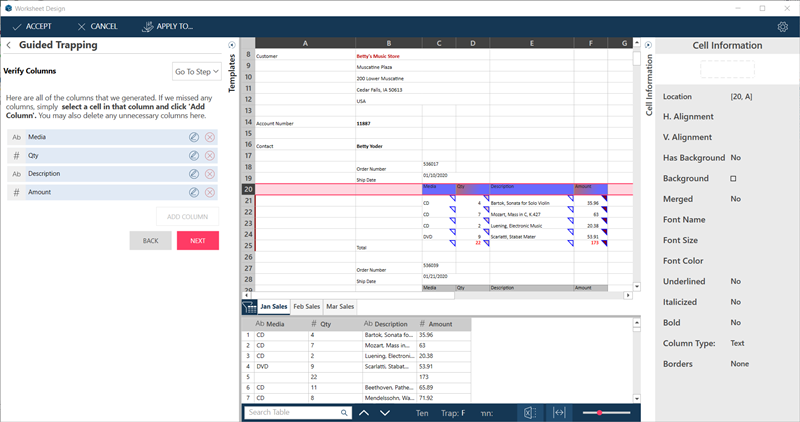
Scan your details and check if columns (detail columns) were missed. If so, select the column(s) and select Add Column.
Otherwise, select Next.
You are next asked to verify your Detail:
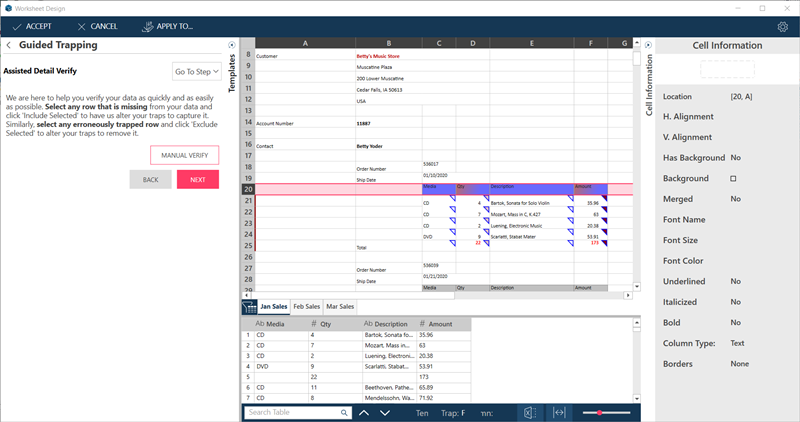
There are two ways you can do this: Manual or Assisted.
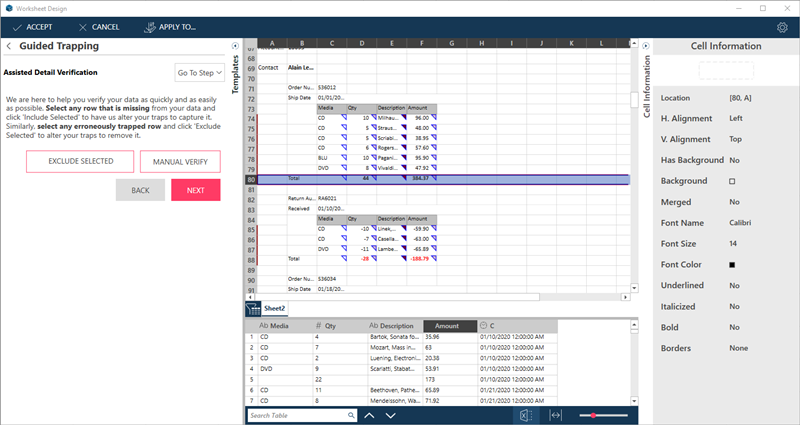
In this method, you select or unselect detail rows and the Wizard will try to adjust the traps to meet your selection criteria.
Click on a row that should be included as a detail and select Include Selected:
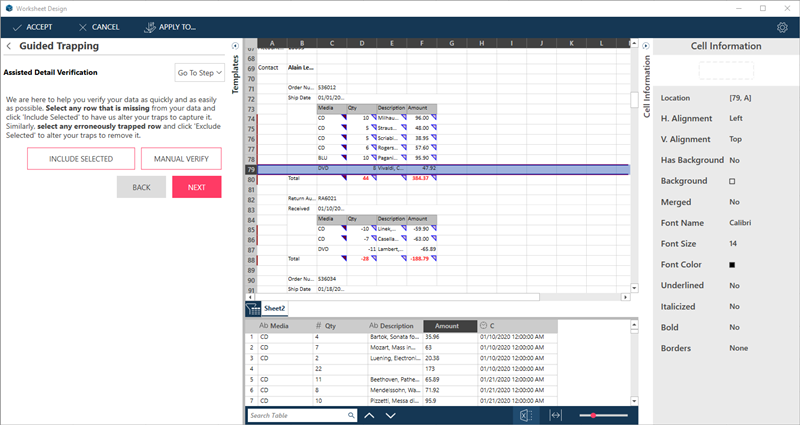
Click on a row that is currently included and click Exclude Selected to remove it as a detail row:
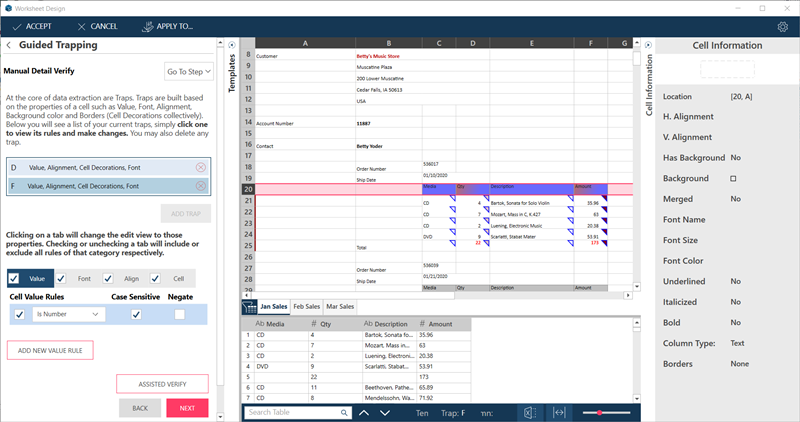
In Manual Verification, review the components of your trap:
and tweak these so that only the cells rows you want are selected.
Click on tabs (Value, Font, Align, Cell) to display and/or tweak the trap values for each.
You may want to read up on traps first before you jump to Manual verification.
Appends are the values that group your details. In our example, sales rows are grouped by Ship Date, then by Order, Contact, and Customer.
The rules for determining details vs. appends are different, but the steps for defining either type are similar.
In this step, select a cell that contains an append value and select Define Append.
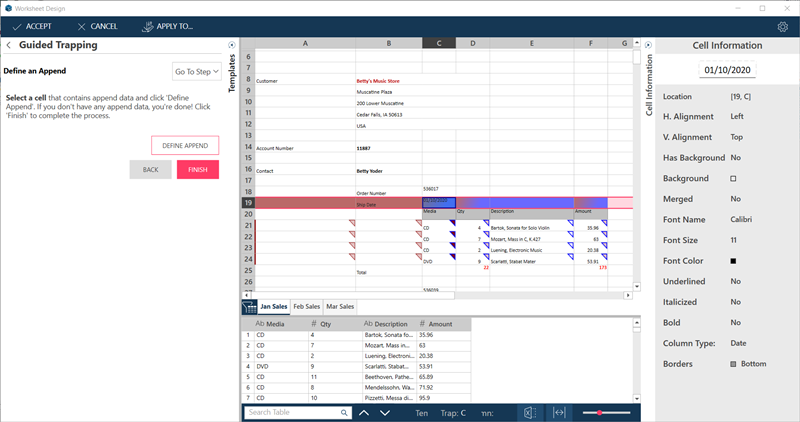
After selecting an Append cell, the values are added to your preview:
Otherwise, select Next.
If you defined a label, you are asked to confirm it.
You are asked to verify your Append:
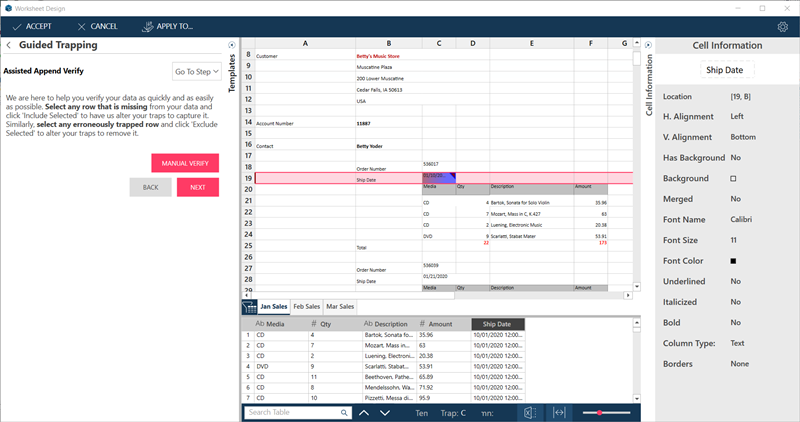
Follow the actions outlined in Step #7 and select Verify Done when complete.
You are asked to Add More Appends.
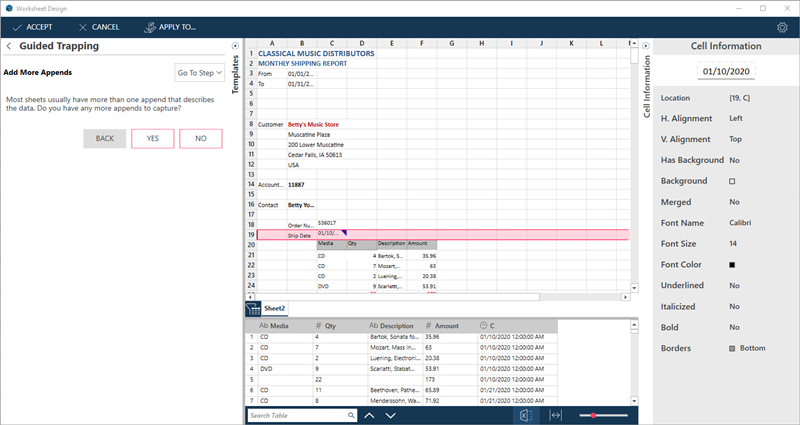
In this case, follow Steps #8-#11.
Otherwise, select Finish.
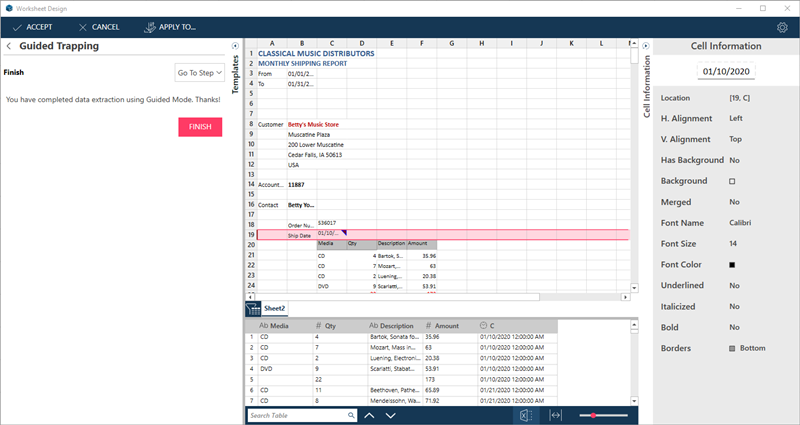
A Note on the Go to Step:
Guide Me shows you how to define templates in a sequential manner. However, you can click on Go To Step at any time to move or jump to a specific step:
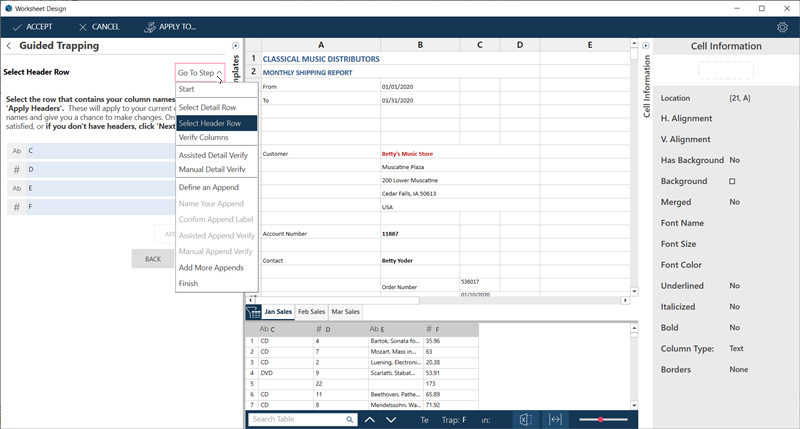
This will allow to easily go from one step to the next and tweak specific detail or append templates.