


|
Creating a Sample User in ServiceNow
The following steps demonstrate how to create a test user for ServiceNow. These steps are based on the Before Authenticating section of the getting started guide from CData: http://cdn.cdata.com/help/BNF/odbc/pg_connectiono.htm.
Steps:
-
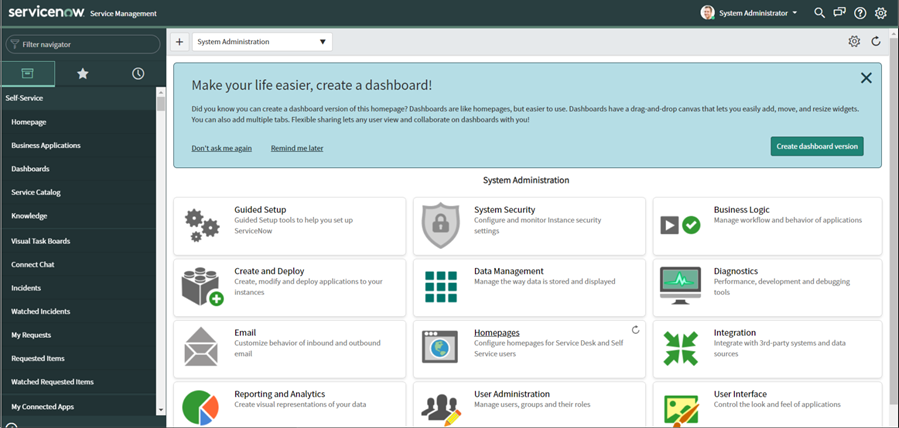
From the Administration Dashboard, go to User Administration at the bottom center of the page:
-
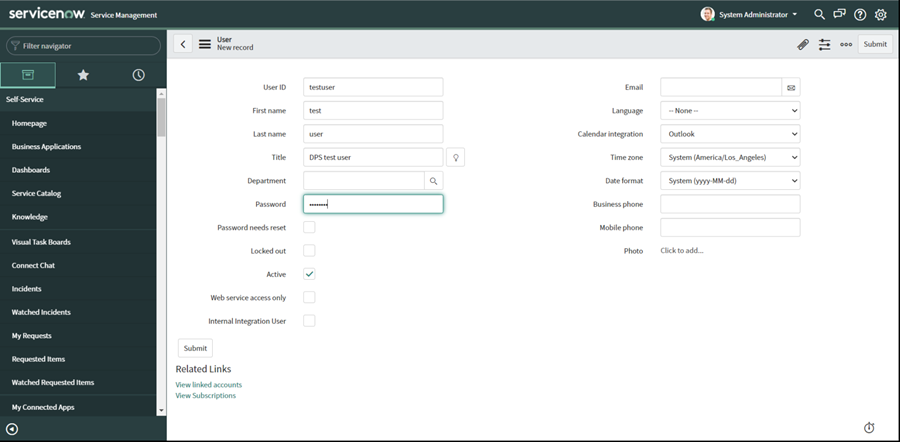
Create a new user, specify the user ID, username details and password, then hit submit:
-
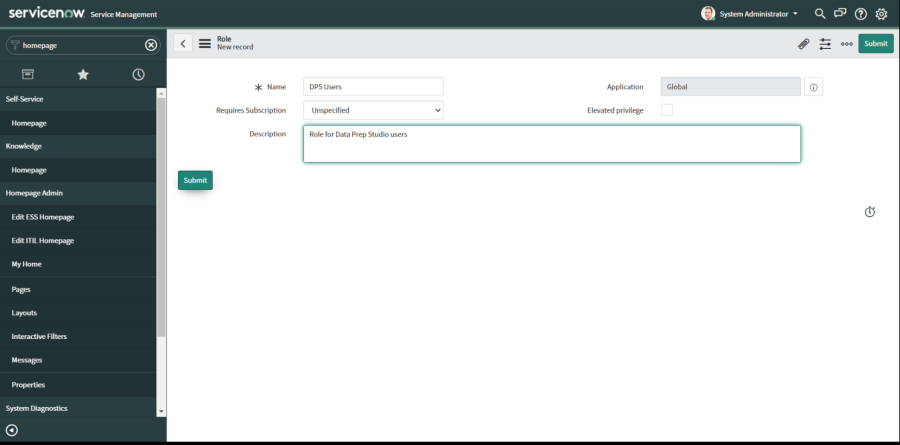
Define a new role, go back to the homepage by clicking on the Homepage link under the Self-Service section on the left side of the menu list, or use the filter navigator and type: "homepage".
Select User Administration and then select Roles. Add a new Role as shown below:
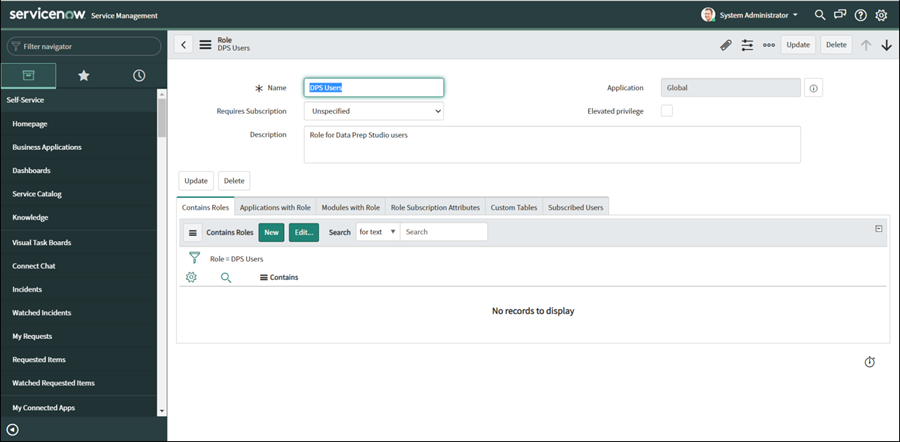
In the Roles list, search for the new Role you have created and click on it’s link:
-
Edit Contains Roles, and Add in role: “personalize_dictionary”. You must Select Update button on the upper right of the page:
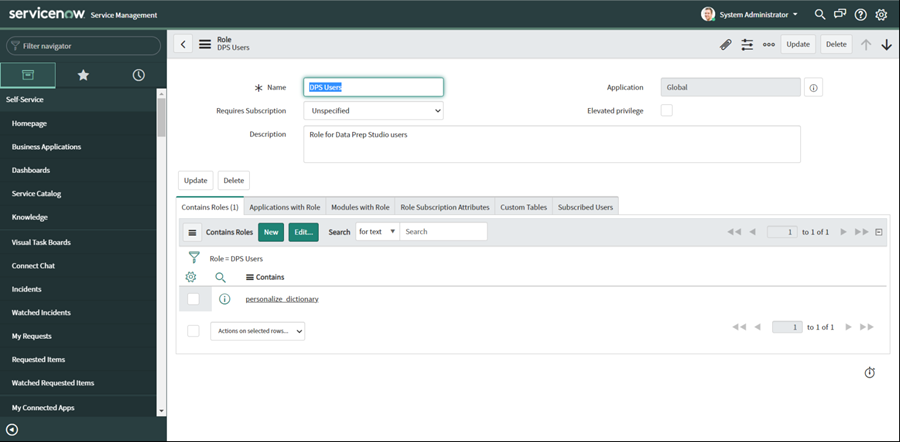
Note: This enables access to sys_dictionary to retrieve schema information from ServiceNow.
Refer to sys_dictionary section of the getting started guide from CData: http://cdn.cdata.com/help/BNF/odbc/pg_connectiono.htm for more details.
-
Go to the Users list either using the User Administration link or using the Filter Navigator and entering Users.
Click on Users link under the Organization section:

Search for your new user and click on it to bring up the properties.
-
Assign the newly created role to the user:
Click on the Edit button at the bottom of the Roles Tab, and select the new role you just created.
Note that personalize_dictionary role is automatically included as an inherited role:
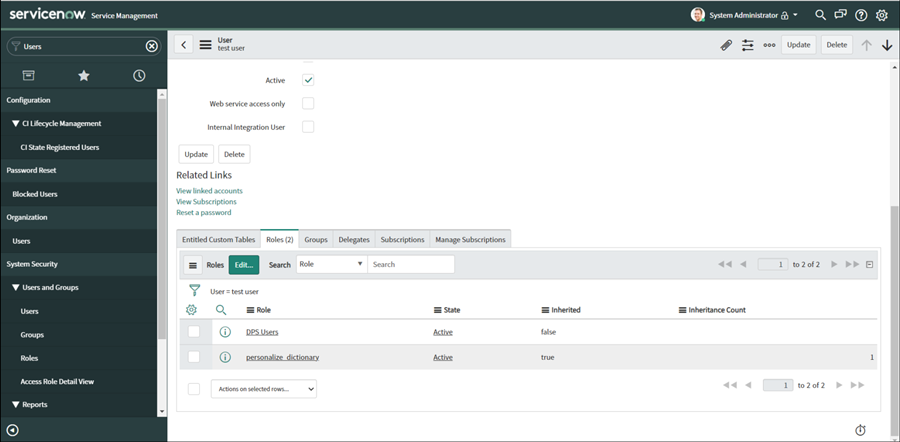
Click on Update on the upper right of the page.
-
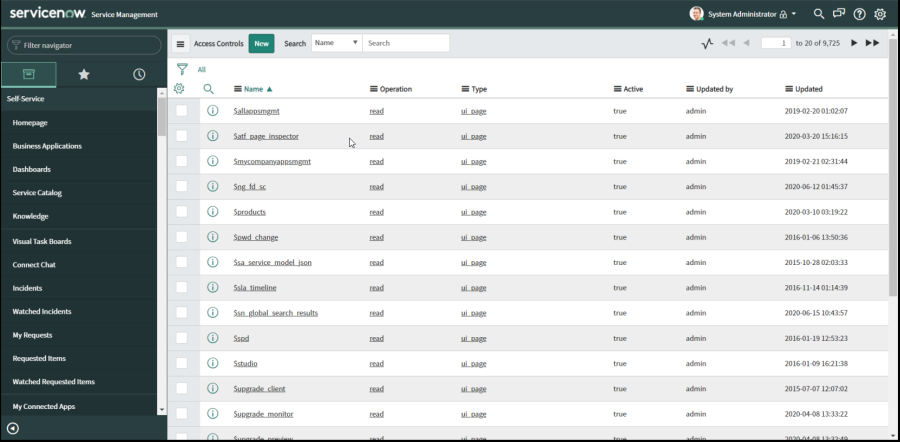
Proceed to the Access Control List (ACL) to define the ACL for the role.
Grant access to the sys_db_object table. Do this by typing Access Control on the filter navigator:
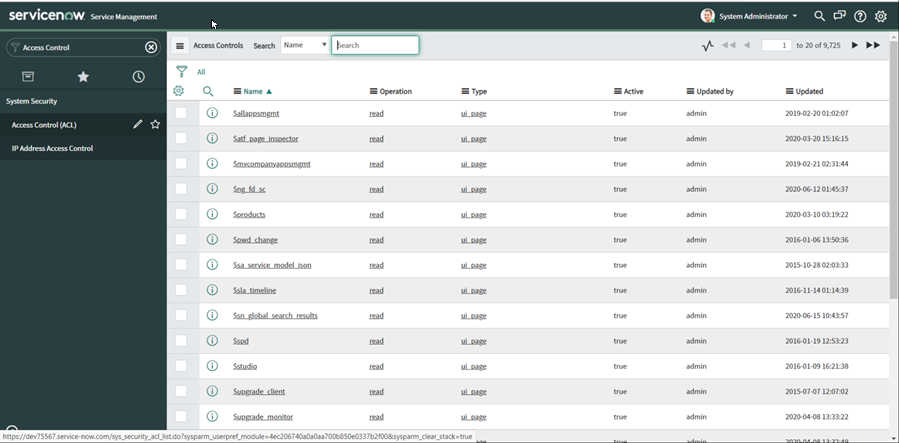
At this point, there is no New button or option to add a new ACL. To do this you must elevate your permission to a security admin by following the next steps below.
-
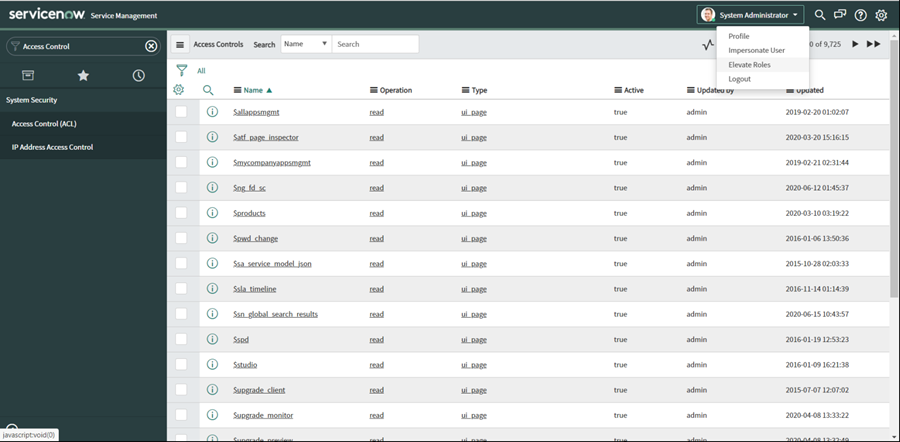
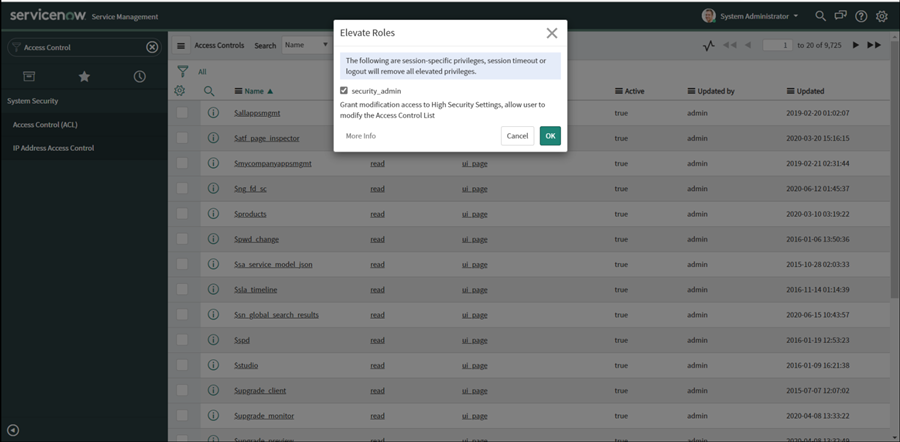
Proceed to elevate the Administrator account to Security Admin.
Select the System Administrator or user icon at the user menu located on the upper right of the page, and then select Elevate Role:
-
Select security_admin and click OK.
You will now see a new button on the list:
-
Add a new ACL to access the sys_db_object table, with the following settings:
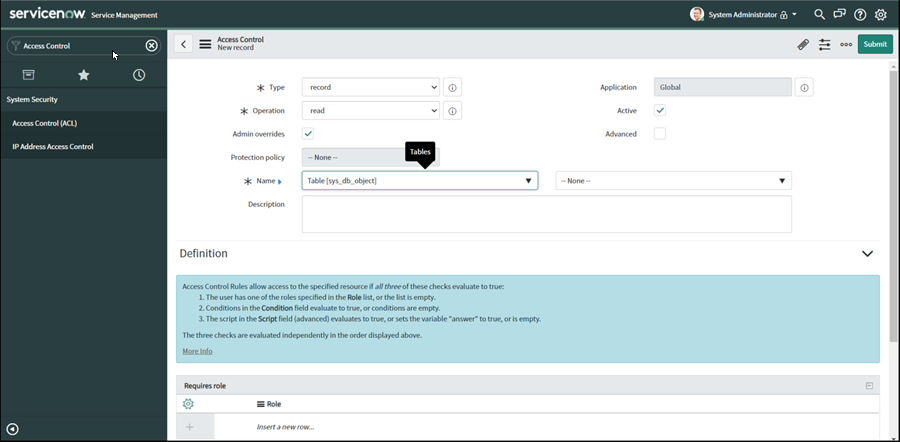
-
Add a Requires Role, using the role you just created. You need to double click on the text box with the label Insert a new role:
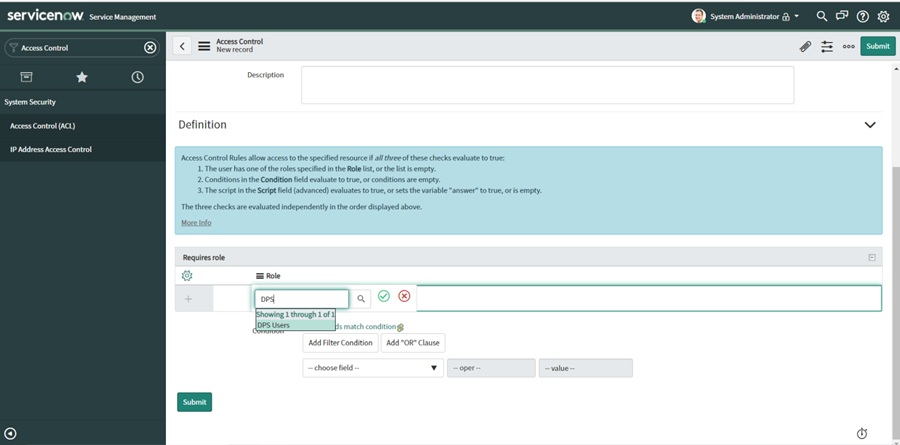
-
Add personalize_dictionary role to the requires role:
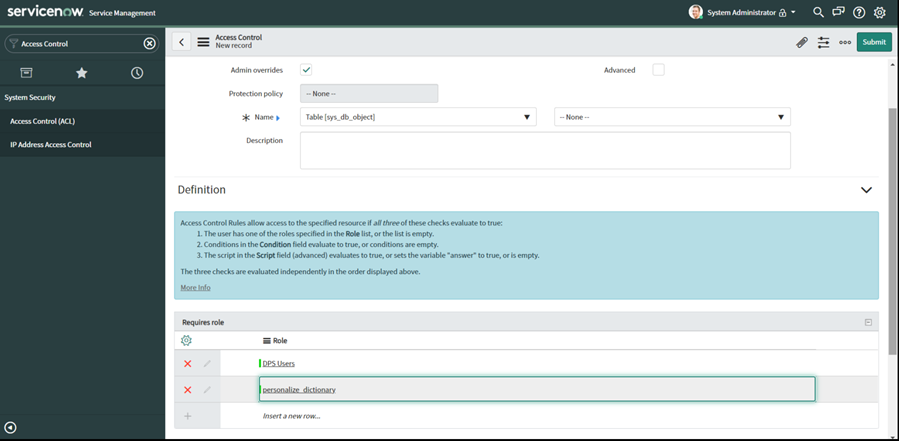
The last two steps above enables row-level permission access to the sys_db_object table required to retrieve data from ServiceNow.
Refer to the sys_db_object section of the Getting Started guide in CData: http://cdn.cdata.com/help/BNF/odbc/pg_connectiono.htm
-
Add a new ACL to the grant field-level permissions to the sys_db_object table, with the following settings:

The steps are similar to those in step 10, except that the field drop down just to the right of the Name field has a value of * instead of –None--.
Add the correct role for the user at the Requires Role section at the bottom of the page.
-
Define an ACL to access the sys_glide_object. Follow the steps in step 10 except that the name should be set to Field class [sys_glide_object].
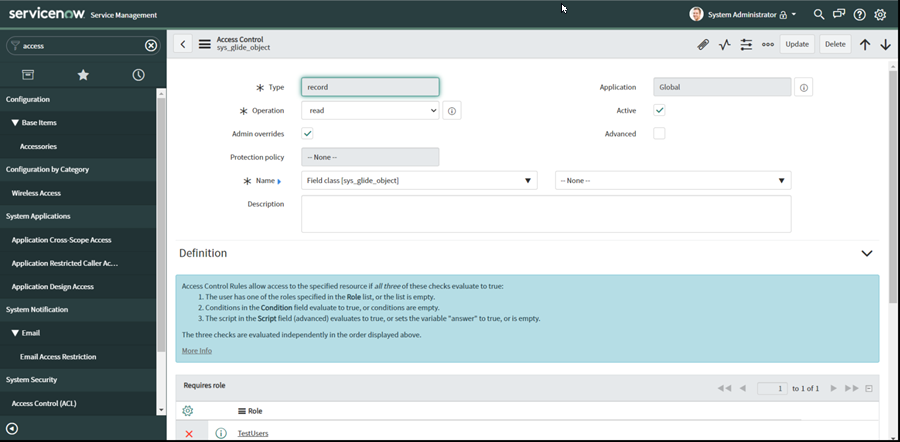
You should now be able to access some tables like the alm_asset.
Read the sys_db_object section of the Getting Started guide in CData: http://cdn.cdata.com/help/BNF/odbc/pg_connectiono.htm
Granting Access to Other Tables
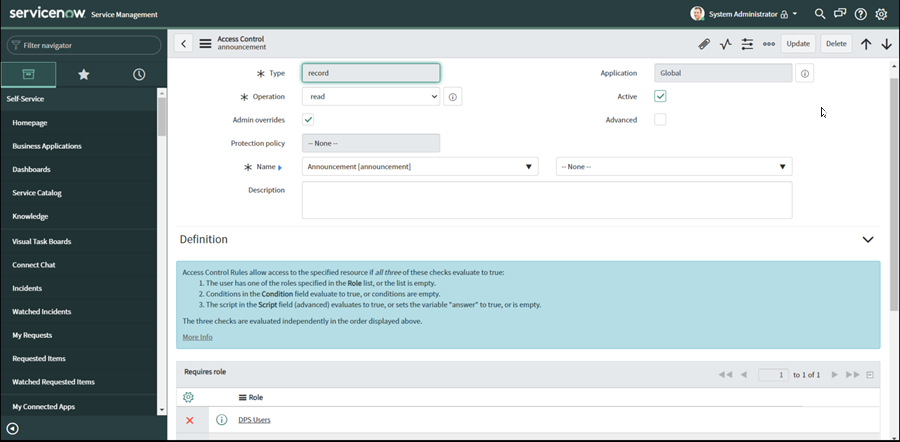
To grant access to the Announcement table, create new ACL for the announcement table.
Set the following values:
-
Type: record
-
Operation: read
-
Requires Role: the Role where your users belong
You page should look like this:
Configuring a Custom application for OAuth Authentication
This step is needed if you want to connect to ServiceNow using OAuth authentication. There are two authentication schemes supported with Service now:
-
Basic Authentication: uses the user ID and password
-
OAuth Authentication: uses the OAuth 2.0 authentication standard. To authenticate using OAuth, you will need to register an OAuth app with ServiceNow to obtain the OAuthClientId and OAuthClientSecret
Steps:
Follow these steps to register an app and obtain the OAuth client credentials, the OAuthClientId and OAuthClientSecret. Note that you will need to activate the OAuth plugin for your instance if it is not active already.
-
Log in to your ServiceNow instance.
-
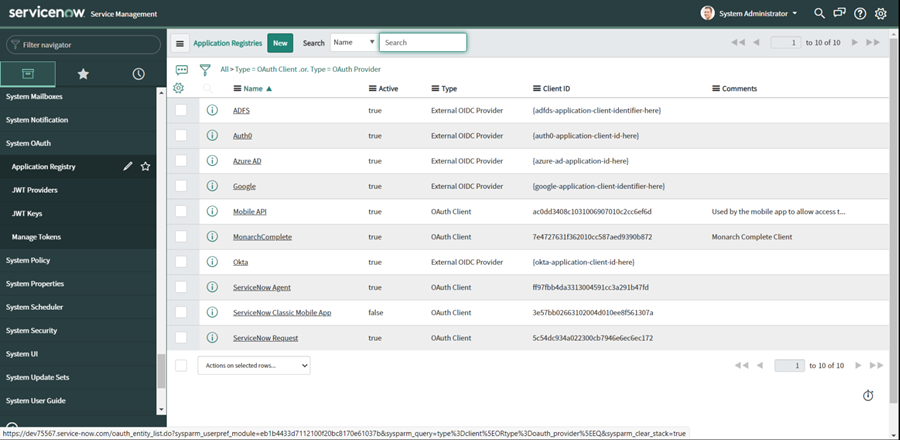
In the Navigator, click System OAuth -> Application Registry.
-
Click New and then click Create an OAuth API Endpoint for External Clients.
-
Click the Active check box and enter the details for your app.
IMPORTANT: For the connection to work in Monarch Complete, the redirect URL must be set to https:/localhost:
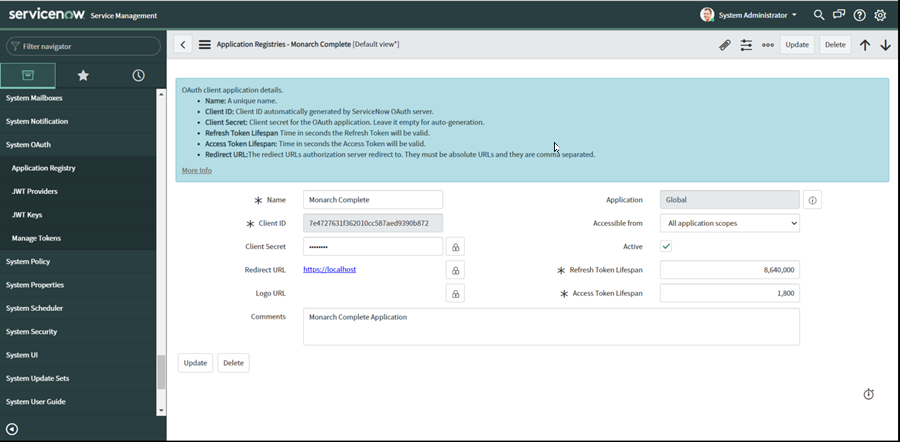
Once you have registered your application, you can use the Client ID and Client secret values in the ServiceNow Connector dialog:
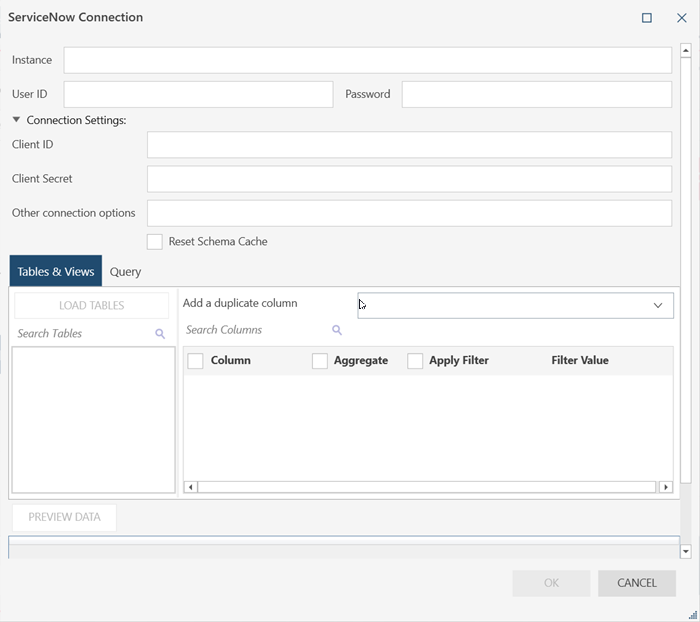
Note that specifying a Client ID or Client Secret values means you want to connect using OAuth, and the User ID and Password fields will be disabled. Since those are only used for Basic Authentication.