Manufacturing Solutions

Renumber panel

Renumber panel

Previous topic Next topic Expand/collapse all hidden text  

Renumber panel

Previous topic Next topic JavaScript is required for expanding text JavaScript is required for the print function  

User Profiles:

Incremental_RADIOSS

Incremental_LS-DYNA

RADIOSS One Step

Die Module

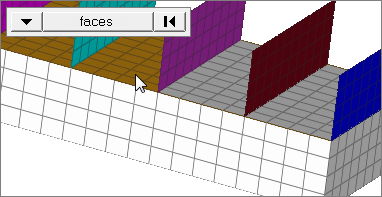
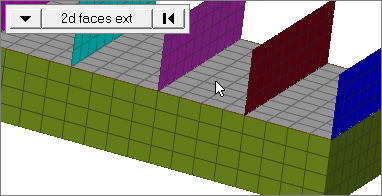
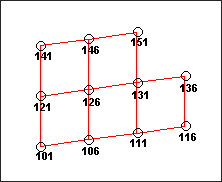
Use the Renumber panel to renumber entities.  You may also enter a value by which to offset the IDs of entities.

When the ID to be assigned to an entity is already assigned to another entity, HyperMesh adds the increment to the ID until a unique ID is found. Because of this, it may be necessary to move the entities out of the way by initially renumbering all of the entities starting with a large ID, and then renumber again with the desired IDs.


Subpanels and Inputs


The Renumber panel contains the following subpanels and command buttons:

hmtoggle_arrow1Single

Use the Single subpanel to renumber individual entities or specific, custom-picked groups of entities.


Panel Inputs

Input

Action

(entity switch)

Use the switch to pick the type of entity to renumber, then use the entity selector to pick the entities that you wish to renumber.

When you select nodes or elems, click the switch to change the selection mode.

nodes

Select individual nodes.

faces_edges_nodes

faces

Select all of the nodes on 2D and 3D faces.

If there are discontinuities on a 2D face, then only the nodes inbetween the discontinuities will be selected.

faces_edges_faces_nodes

2D faces ext

Select all of the nodes on a 2D face that contain discontinuities.

faces_edges_2d_face_ext_nodes

loops

Select all of the nodes on continuous free edges that make a closed loop simultaneously, such as the perimeter of a hole.

Only valid for SHELL elements.

faces_edges_loops_nodes

free edges

Select all of the nodes on free edges of elements.

If there are discontinuities on an edge, then only the nodes on the free edges inbetween the discontinuities will be selected.

Only valid for SHELL elements.

faces_edges_free_edges_nodes

free edges ext

Select all of the nodes on free edges of elements that contain discontinuities.

Only valid for SHELL elements.

faces_edges_free_edges_ext_nodes

edges

Select all of the nodes on free edges or shared edges (butt joints, L/corner joints, and T-joints) of elements.

If there are discontinuities on an edge, then only the nodes on the edge inbetween the discontinuities will be selected.

Only valid for SHELL elements.

faces_edges_edges_nodes

edges ext

Select all of the nodes on free edges or shared edges (butt joints, L/corner joints, and T-joints) of elements that contain discontinuities.

Only valid for SHELL elements.

faces_edges_edges_ext_nodes

elems

Select individual elements, or select all of the elements contained by a component or on a surface.

faces_edges_entities

faces

Select all of the elements on 2D and 3D faces.

If there are discontinuities on a 2D face, then only the elements inbetween the discontinuities will be selected.

faces_edges_faces

2D faces ext

Select all of the elements on a 2D face that contain discontinuities.

faces_edges_2d_faces_ext

start with =

Enter the starting ID for the entities you selected.

increment by =

Enter the value by which to increment the entity IDs.

offset =

Enter the value with which to offset the selected entities.

It is possible to offset by both positive and negative values, provided that the offset IDs of all selected entities are greater than zero.

face angle / individual selection

Face angle

The face angle is the angle between the normal of facets that share an element edge. A facet can either be a shell element itself, or one of the faces of a solid element. The normal of triangular facets is that of the plane defined three corner vertices. Whereas, the normal of quadrilateral facets is calculated by taking the cross-product between its two diagonals. This special treatment for quadrilaterals is because a warped shape does not lie completely on a plane.

Only available when the entity selector is set to nodes or elems and the selection mode is set to faces, 2d faces ext, free edges, free edges ext, edges, or edges ext.


Individual Selection

Select individual elements on a face or select individual free/shared edges of elements.

Only available when the entity selector is set to nodes or elems and the selection mode is set to faces, free edges, or edges.

edge angle

Splits edges that belong to a given face.

When the edge angle is 180 degrees, edges are the continuous boundaries of faces. For smaller values, these same boundary edges are split wherever the angle between segments exceeds the specified value. A segment is the edge of a single element.

Only available when the entity selector is set to nodes and the selection mode is set to free edges, free edges ext, edges, or edges ext.


hmtoggle_arrow1All

Use the All subpanel to renumber all entities in the model, regardless of type.


Panel Inputs

Input

Action

start with =

Enter the starting ID for the entities you selected.

increment by =

Enter the value by which to increment the entity IDs.

offset =

Enter the value with which to offset the selected entities.

It is possible to offset by both positive and negative values, provided that the offset IDs of all selected entities are greater than zero.


hmtoggle_arrow1Command Buttons

The following action buttons appear throughout the subpanels:

Button

Action

renumber

Renumbers the selected entities according to the input settings.

min/max

This button only displays on the single subpanel, and causes the total number and the range of numbers of the selected entity type to display as a message in the status bar. If entities are selected, the total number and range of numbers includes only the selected entities; otherwise, all entities of the type specified by the entity switch are counted.

offset

Each time you click offset, the numbers are offset by the value specified in offset =.

reject

Undo the renumbering of entities.

return

Exit the panel.


How do I...

expand-green-10Renumber entities
1.Click the switch and select the data type of the entities that you want to renumber.
2.Indicate which entities you want to renumber by picking them on your model, or click the data type and choose from the extended entity selection menu.

renumber1

3.Click start with = and enter the starting ID for the entities you selected.
4.Click increment by = and enter the value by which to increment the entity IDs.
5.Click renumber.

renumber2


Comments

When the ID to be assigned to an entity is already assigned to another entity, HyperMesh adds the increment to the ID until a unique ID is found.  Because of this, it may be necessary to move the entities out of the way by initially renumbering all of the entities starting with a large ID, and then renumber again with the desired IDs.

expand-green-10Offset entity numbers by adding an offset value
1.Click the switch and select the data type of the entities that you want to renumber.
2.Indicate which entities you want to renumber by picking them on your model, or click the data type and choose from the extended entity selection menu.

renumber3

3.Click offset = and enter the value with which to offset the selected entities.
4.Click offset.

Each time you click offset, the numbers are offset by the value specified after offset =.

renumber4


Undo

Use offset again, with the menu item offset = set to the negative value of the original offset value.


Comments

It is possible to offset by both positive and negative values, provided that the offset IDs of all selected entities are greater than zero.

expand-green-10Review the total number and range of numbers of an entity type
1.Use the entity selector to select the entity type that you want to review.
2.Click min/max.

The total number and the range of numbers of the selected entity type are displayed as a message in the status bar.


Comments

If entities are selected, the total number and range of numbers includes only the selected entities.


See also

An Alphabetical List of Panels