In this tutorial, you will change the shape of the windshield while keeping its area
constant.
This exercise uses the windshield.hm file, which can be found in the
hm.zip file. Copy the file(s) from this directory to your
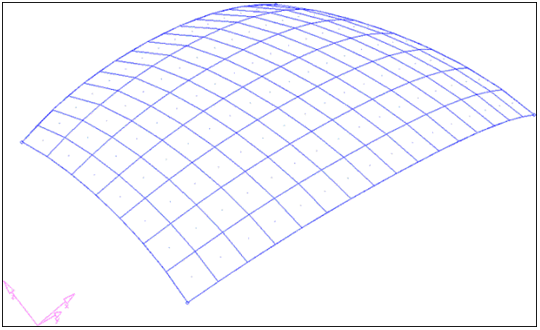
working directory. Figure 1.
Open the Model File
In this step, you will open the model file,
windshield.hm.
Open the model file, windshield.hm.
Create a Shape
In this step, you will create a shape to define the degree of freedom for the
mesh.
From the menu bar select Morphing > Free Hand and select the move nodes subpanel.
Switch the method to translate.
Type in the following values:
X = 0
Y = -5
Z = 0
Under moving nodes: click nodes >> by sets and select
move_node.
Click select.
Under fixed nodes: click nodes >> by sets and select
fix_node.
Click select.
Under affected elements: click elems >> displayed.
Click morph.
Go to the save shape subpanel.
For name=, type Shape1.
Toggle the save option to as node perturbations.
Click save.
Click undo all to bring the model to its original
position before morphing.
This initial shape defines the direction in which the nodes have the freedom
to move, as the shape of the windshield is changing, thus enabling us to keep
the area at a constant.
Create a Constraint
In this step, you will create a constraint.
From the menu bar, select Morphing > Create > Morph Constraints.
Set name= to const1.
Change the constraint type to area.
For shapes, select Shape1.
Select elems >> displayed.
Switch the area option to equal to.
Click calculate to calculate the area of the mesh.
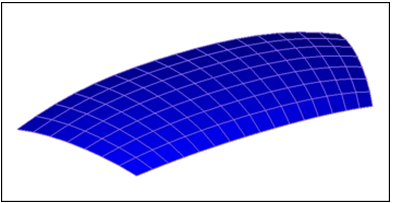
The value shown in the area box is 1.085e+06. This is the actual surface
area of the windshield which will be maintained.
Click create.
Figure 2.
Note: The constraint is created. The symbol for the constraint is a
matching-mesh.
Right-click Shape and select Hide
in the Model Browser.
Right-click MorphingConstraint and select
Hide in the Model Browser.
Create Morph Volume
In this step, you will create morph volume.
From the menu bar, select Morphing > Create > Morph Volumes.
Switch the method to create morphvol.
Toggle entity type to enclose elems.
Select elems >> displayed.
Toggle coordinate system to global system.
Click create.
The morph volume is created.
Morph the Part
In this step, you will morph the part.
From the menu bar, select Morphing > Morph and select the move handles
subpanel.
Change the morph type to move to node.
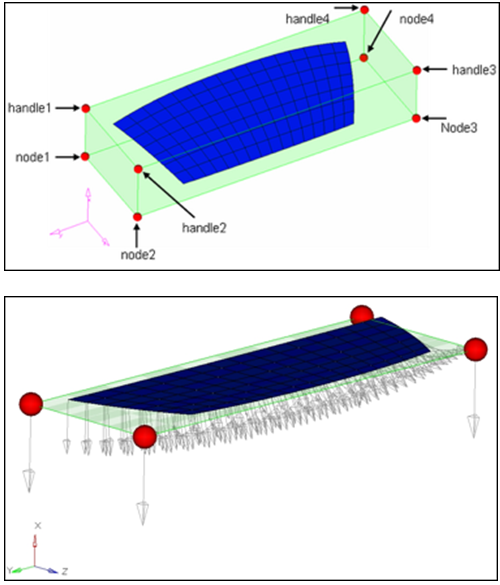
For from: handle, select handle1 as shown in the image
below.
For from: node, select node1 as shown in the image
below.
Repeat the process for the other handles and nodes.
Figure 3.
Save the Morphed Shape
In this step, you will save the morphed shape.
Click the save shape radio button.
Set name= to Shape2.
Toggle the save option to as node perturbations.
Click save.
Check the Result
In this step, you will check the result.
Right-click MorphingVolume in the Model Browser and select Hide.
Go to View > Toolbars, make active the Checks toolbar, and
select the Mass/Area Calc ()
icon.
For comps, select windshield.
Click select.
Click calculate.
The final area of the windshield is 1.085e+06, which is the same as the
initial area. So, even though the profile of the windshield has changed, its
area has not. As the height of the windshield reduced, it expanded in the
direction provided by Shape1.
 )
icon.
)
icon.