Run a Tryout Analysis
Run the forming operations for a tryout analysis.
-
From the Tryout ribbon, Run tools, click Run
Analysis.

-
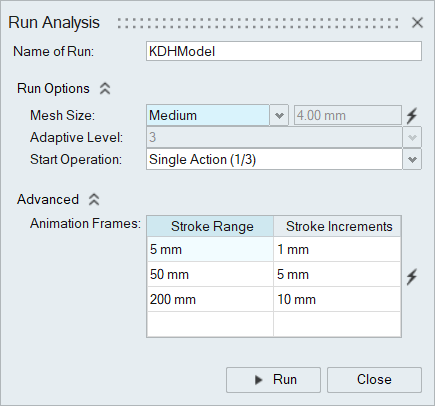
In the Run Analysis dialog, enter a name for the
analysis.
-
Determine the Mesh Size. Choose from the following
options: Coarse, Medium,
Fine, Custom, or
Adaptive. For Custom and
Adaptive, enter a value for the mesh size. Enter a
value for Adaptive Level if you select
Adaptive. Use the lightning bolt
 to restore the mesh size to default parameters set
in Preferences.
to restore the mesh size to default parameters set
in Preferences.
-
In the Animation Frames table, you can adjust the
frequency of the animation slices, depending on the stroke range as the tool is
traveling to deform the sheet.
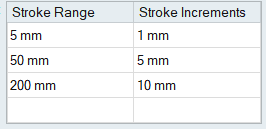
- Stroke Range
- Upper limit for the stroke measured from the closed position
- Stroke Incremements
- Amount of tool travel between animation frames
Run Options: Local vs. Remote
Choose whether to run jobs locally, in the cloud, or on a remote job server.
Click the Run group label to define how jobs are run.
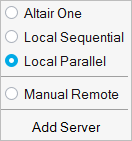 Figure 1. Run Options Menu
- Altair One
- Run jobs in the cloud on Altair One. You will be asked to login first.
- Local Sequential
- Queue run requests on your local computer and run one after the other.
- Local Parallel
- Immediately execute all runs simultaneously on your local computer.
- Manual Remote
- Manually run a job on a remote server. Select this option if using a remote server that is not an Altair PBS server.
- Custom Server
- If you have added a remote server, the name of the server will appear in the menu. Select it to run jobs remotely on that server.
- Add Server
- Add and configure a remote job server.
Run a Job Manually
Manually copy a prepared model file and queue it on a remote jobs server.
-
Click the Run group label to display run options.
-
Set up and
run an analysis using the Run Analysis
window.
The Run Status window appears.
-
Click the
 satellite on the Analyze icon to open the
Run Status window.
satellite on the Analyze icon to open the
Run Status window.
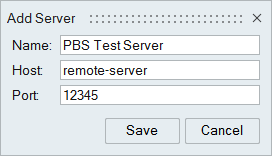
Add a Remote Job Server
Add and configure an Altair PBS server to run jobs remotely.
-
Click the Run group label to display run options.
-
Enter the Name, Host, and
Port.
-
Click Save.
A cloud icon appears next to the Run menu when the connection to the server has been established.

If Inspire Form is integrated with Altair PBS Works, you can connect to an:
- HPC Cluster running PBS Professional Workload Manager
- HPC Cluster running LSF Workload Manager
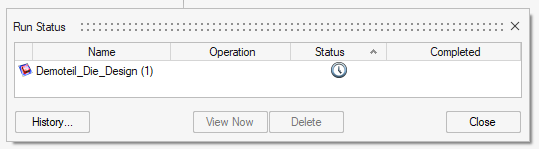
Run Status
View the status of the current run, as well runs for the current model that have not yet been viewed. To see all past runs, you need to view the run history.
-
.
The run status is displayed.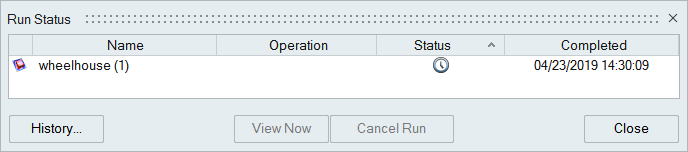
-
When the run is complete, review its status.
Status Description Note 
The run completed successfully. This is also indicated by a green flag above the Analysis icon. You can click the green flag to display the results.

The run was incomplete. Some but not all of the result types may be available. You should run a new analysis to generate complete results.

The run failed and no meaningful results are available. This is also indicated by a red flag above the Analysis icon.
Run History
View, sort, open, and delete past runs for the current and previous models.
-
On the
Analysis icon, click Run
History.

The run history is displayed.
-
Review the status of the run.
Status Description Note The run completed successfully. The run was incomplete. Some but not all of the result types may be available. You should run a new analysis to generate complete results.
The run failed and no meaningful results are available.
- To open the directory where a run is stored, right-click the run name and select Open Run Folder. The default directory where the run history is stored can be changed in the Preferences under Run Options.
- By default, you will receive a notification when the run history exceeds a certain size. You can change the size limit or turn off the notification in the Preferences under Run Options.
- To delete a run, select the run and press Delete.