Defining a Named Point to Use in Geometry Creation
Create a named point to create parametric geometry.
On the Construct tab, in the Define group, click the Add point icon.
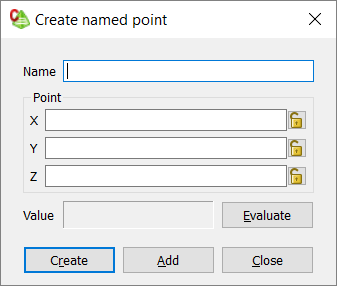
Figure 1. The Create named point dialog.
In the Name field, enter a name for the named
point.
Under Point, enter the X coordinate, Y coordinate and Z coordinate using one of the
following workflows:
Enter the values manually.
Use point-entry to add the coordinates from the 3D view.
[Optional] To view the result of the expression or test the validity of the
expression (without closing the dialog), click
Evaluate.
The calculated result is displayed in the Value
field.
Note: The result is maintained until the next time the expression is
evaluated (the result is not updated automatically when the expression is
changed).
Select one of the following workflows to close the dialog.
To create the named point and close the dialog, click Create.
To create the named point, but keep the dialog open to create another
named point, click Add.
 Add point icon.