


|
Text (Including CSV)
The Text connector allows the retrieval and processing of delimited Text files (such as CSV, TSV, and so on), either from a disk or from a defined URL.
Using Text
-
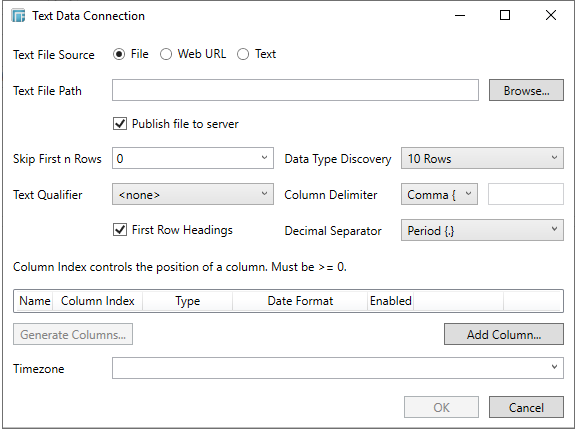
When creating a new data table, select Text from the Connect to data dialog. The Text Data Connection dialog displays.
-
Select the text file source:
-
-
File
-
Then browse to the file source. By default , the Publish File to Server checkbox should be selected.
NOTE: If unchecked, the file will not be uploaded while publishing the workbook and no change in the file path will be done. Consequently, the data file should be copied in the <AppData>\data folder (i.e., c:\vizserverdata\data).
This is beneficial when the files are large. Also, it will be easier to update or overwrite data files on the server.
-
-
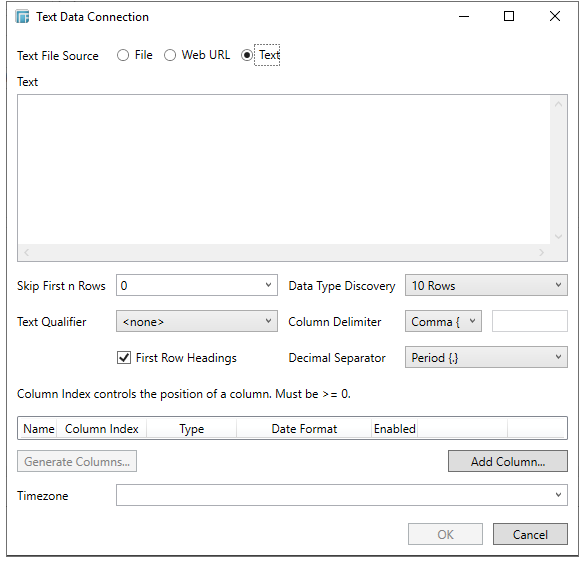
Text
-
Then enter the text block to be parsed.
-
-
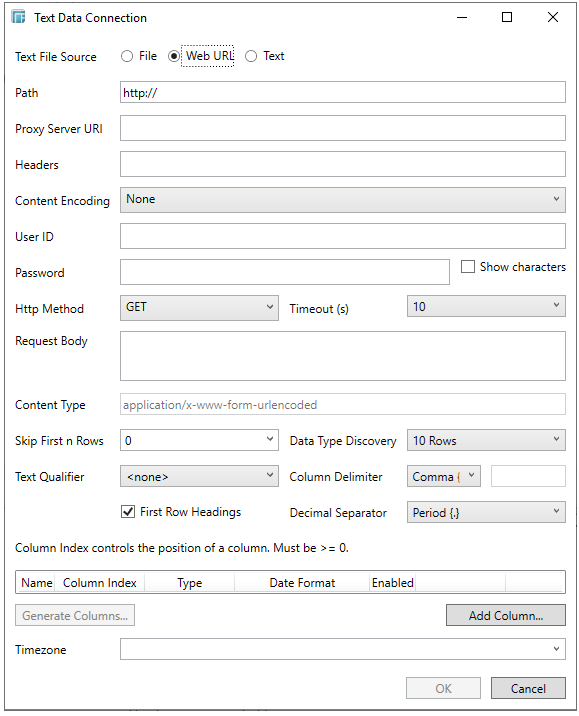
Web URL
-
The dialog changes slightly to allow specification of the following:
-
The absolute Path including the http where the Text file is located
-
The HTTP Proxy setting that will allow the Text connector to reach the endpoint
-
Headers
-
-
Headers are separated by a comma
-
Each Header is entered as Name = Value, where Name and Value can be enclosed in double quotes to allow inclusion of any character except for double quotes
-
Name and Value can also be left unquoted, in which case they may not include comma or equals characters
-
NOTE:
In case of an invalid Header entry, the border of the input box changes to red. Modify the entry until the requirements are met or when the border changes to the default color.

Furthermore, if you enter a valid Header in key=value pair (e.g., panheader=testvalue), the rest of the invalid inputs will be ignored. Consequently, only the valid Header entries will be part of the request.

-
Select the Content Encoding with the HTTP Header: None, GZip, Deflate, or GZip and Deflate
-
The User ID and Password required to connect to the Text file
Check the Show Characters box to display the entered password characters.
-
Select the HTTP Method to map any of the following operations to HTTP requests
-
GET - retrieve information
-
POST - create or update an entity
-
PUT - replace an existing entity
-
DELETE - remove a requests
-
Request Body (for HTTP POST)
-
Set the required Content Type header (default is application/x-www-form-urlencoded)
The Context Type text box becomes editable only when there is a specified entry in the Request Body text box.
-
Timeout in seconds (to wait for server response). Select from 10 to 300 seconds,
The URL, Headers, User ID, Password, Request Body, and Content Type can be parameterized, to allow dynamical data retrieval.
The standard settings controlling how the text file is parsed is listed.
These include:
-
The Skip First n Rows drop-down list box specifies the number of first rows to be skipped

-
The Data Type Discovery drop-down list box specifies how many rows from the text file should be used when automatically determining the data types of the resulting columns.

-
The Text Qualifier drop-down list box specifies if fields are enclosed by text qualifiers, and if present to ignore any column delimiters within these text qualifiers.

-
The Column Delimiter drop-down list box specifies the column delimiter to be used when parsing the text file.

-
The First Row Headings check box determines if the first row should specify the retrieved column headings, and not be used in data discovery.

Once a file/URL has been selected, the dialog would display as follows:
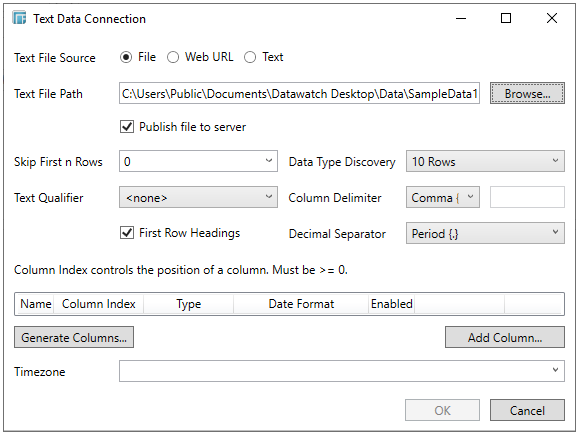
The schema of the source file is then defined by clicking the Generate Columns... button.
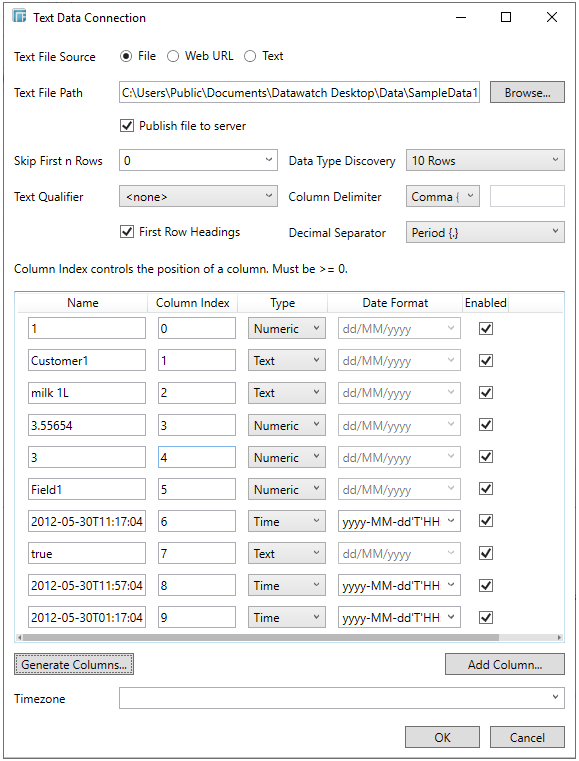
This populates the list of columns, with the data type found from inspecting the first ‘n’ rows of the file.
At this point the retrieved schema can be modified to:
-
Disable specific fields
-
Change Data Types (e.g., a numeric value should be cast to a text string)
-
Specify how to parse the Date/Time format
NOTE:
To parse and format times with higher than millisecond precision, the format string needs to end with a period followed by sequence of lower case Fs. There can be no additional characters following them.
For example: yyyy-MM-dd HH:mm:ss.ffffff
-
Specify whether to retrieve the field
Click Add Column... to add more columns and specify their properties.
-
The time zone of input parameters and output data is by default unchanged. Changing the time zone is supported through the Timezone list box, based on the assumption that data is stored in UTC time and outputs are presented in the selected time zone.
Likewise, the time zone can also be parameterized.
-
Once the schema has been adjusted as appropriate the OK button can be pressed to retrieve the source data.
The source table is returned in the Edit Data Table view with the title of the file and the fields listed in the Data Source Preview.