


|
Stream Simulator
The Stream Simulator connector is very similar to the Text connector with the addition of the time windowing of message queue connectors. The Stream Simulator Connection dialog includes setting for how fast and how many messages are pushed through in each batch.
Using Stream Simulator
-
When creating a new data table, select Stream Simulator from the Connect to data dialog. The Stream Simulator Connection dialog is displayed:
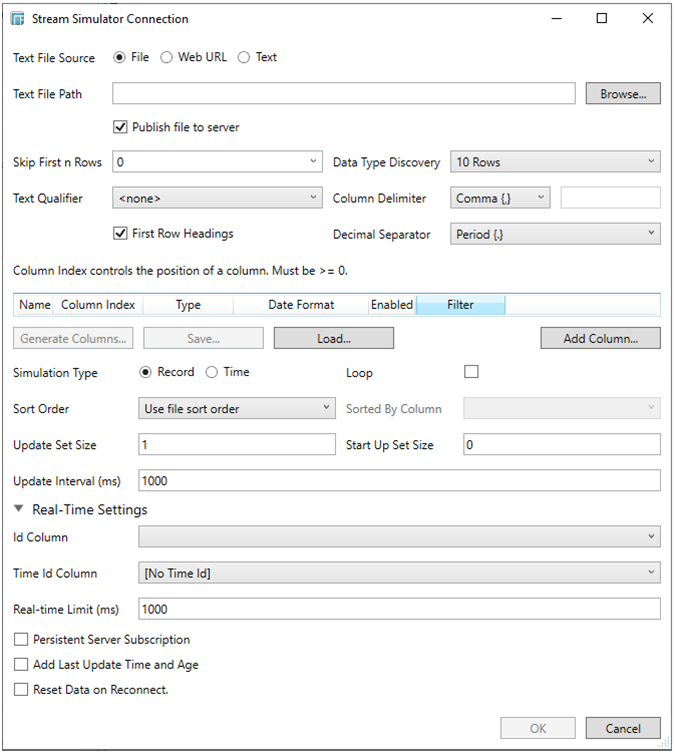
-
Select the text file source:
-
-
File

-
-
Then browse to the file source. By default , the Publish File to Server checkbox should be selected.
NOTE: If unchecked, the file will not be uploaded while publishing the workbook and no change in the file path will be done. Consequently, the data file should be copied in the <AppData>\data folder (i.e., c:\vizserverdata\data).
This is beneficial when the files are large. Also, it will be easier to update or overwrite data files on the server.
-
Text
Enter the text block to be parsed.
-
-

-
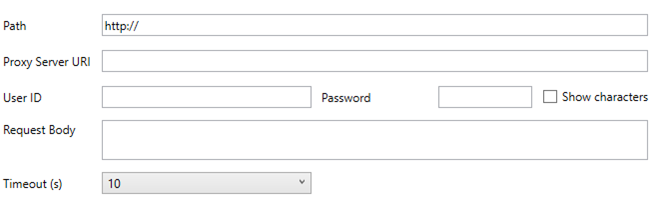
Web URL
The dialog changes slightly to allow specification of the following:
-
-
-
-
-
-
The location of the message broker
-
The HTTP Proxy setting that will allow the Text connector to reach the endpoint
-
User ID
-
Password
-
Check the Show Characters box to display the entered password.
-
-
Request Body (For HTTP POST)
-
Timeout in Seconds (to wait for Server response)
-
The URL, User ID, Password, and the Request body can be parameterised, to allow dynamical data retrieval.
The standard settings controlling how the text file is parsed, is listed.
These include:
-
-
Skip First n Rows
-
Data Type Discovery
-
Decimal Separator
-
Text Qualifier
-
Column Delimiter
-
First Row Headings
-
The Data Type Discovery Drop list box specifies how many rows from the text file should be used when automatically determining the data types of the resulting columns.

The Text Qualifier Drop list box specifies if fields are enclosed by text qualifiers, and if present to ignore any column delimiters within these text qualifiers

The Column Delimiter Drop list box specifies the column delimiter to be used when parsing the text file.

The First Row Headings checkbox determines if the first row should specify the retrieved column headings, and not be used in data discovery.

-
-
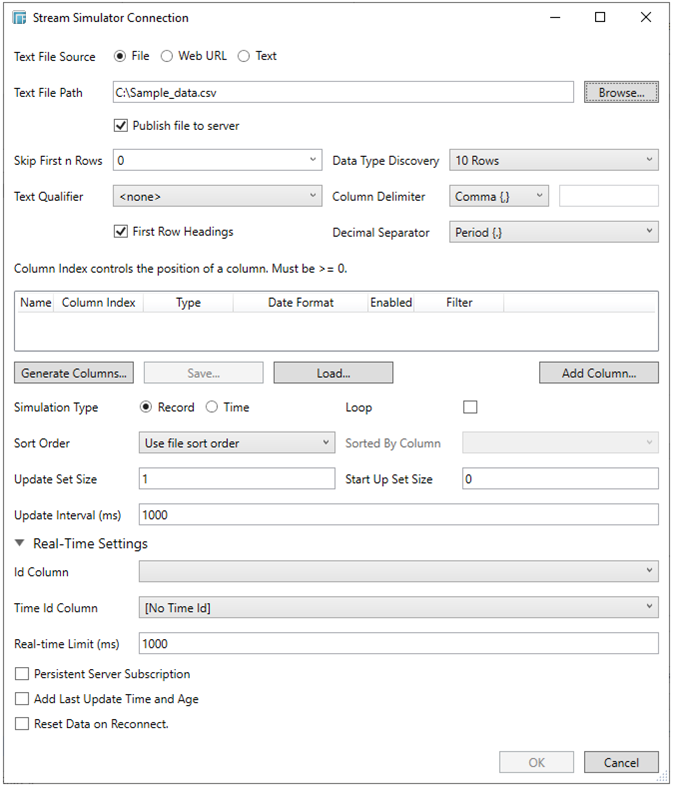
Once a file / URL has been selected, the dialog would display as follows:
-
-
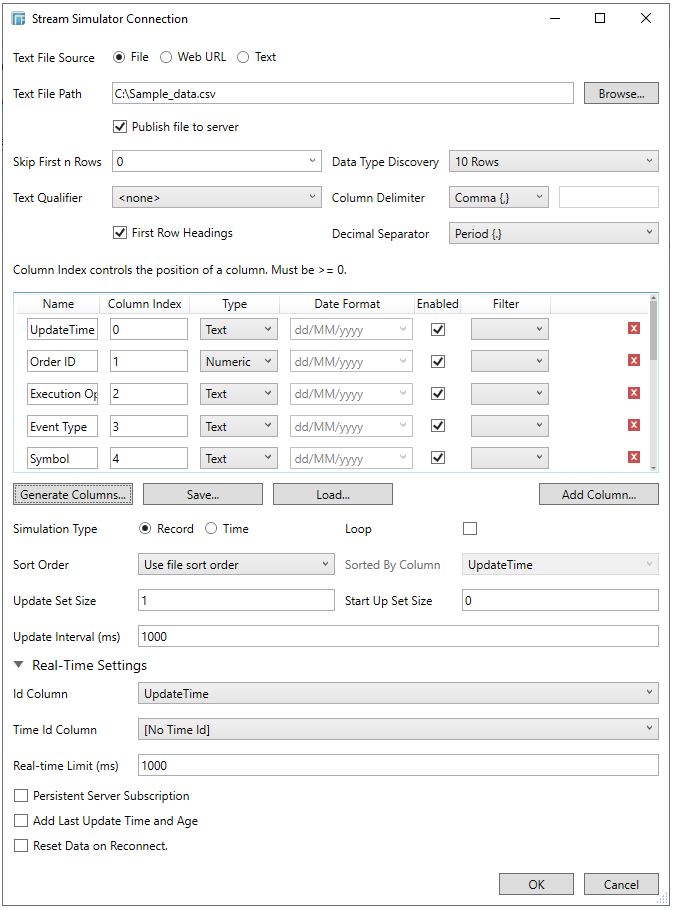
The schema of the source file is then defined by clicking the Generate Columns… button.
-
This populates the list of columns, with the data type found from inspecting the first ‘n’ rows of the file.
At this point the retrieved schema can be modified to:
-
-
Disable specific fields
-
Change Data Types (e.g., a numeric value should be cast to a text string)
-
Specify how to parse the Date/Time format
-
-
NOTE:
-
To parse and format times with higher than millisecond precision, the format string needs to end with a period followed by sequence of lower case Fs. There can be no additional characters following them.
-
For example: yyyy-MM-dd HH:mm:ss.ffffff
-
-
Specify whether to retrieve the field
-
-
Click Add Column… to add more columns and specify their properties.
Click
 to delete
a column in the list.
to delete
a column in the list.
-
You can opt to save the columns definition into an XML format by clicking the Save button. The saved XML files are placed in …\Public\Public Documents\Datawatch Desktop\Column Schemas.
-
Click Load to load the column schema.
-
Select the Simulation Type:
-
-
Record
-
-
Sends the number of records for each interval of time. By default, records are sent in the same order of the source.

This simulation type allows the specification of the following:
-
Sort Order
-
-
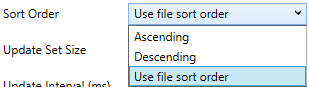
-
When you select the Use file sort order, it will use the default sorting order of the file.
-
When you either select Ascending or Descending as the Sort Order, this enables the Sorted by Column drop down list.
-

-
Select the column that will be used for the sorting.
-
-
Update Set Size
-
-
The number of records, set to be updated during simulate/playback. Default is 1
-
-
Start Up Set Size
-
-
The number of records, set to be published initially (on start-up). Default is 0.
-
-
Update Interval (ms)
-
The update interval period for the record based playback. Default is 1000 (ms).
-
-
Time
-
Simulates records as they occur in real-time.

This simulation type allows the specification of the following:
-
-
Playback Column
-
-
The playback column which is a Date/Time type.
-
-
Playback Speed
-
A multiplier which to either speed up or slow down the playback. Default is 1.
-
If 0 < value < 1 slow down
-
If value = 1 records will be published as they occur
-
if value > 1 speed up
NOTE: For time-based simulation, if the Date/Time column have improper dates, it will fail and stop.
-
Check the Loop box to enable looping through the file.
-
Expand Real-Time Settings.
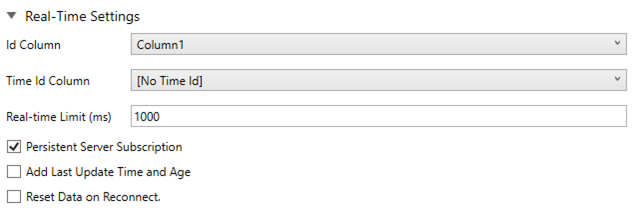
Refer to Defining Real-Time Settings for more information.
-
Click OK to confirm the selection and retrieve the record set into Panopticon Designer (Desktop).
Initially, there is no data displayed in the Data Source Preview section of the Edit Data Table window.
Click the Start Preview button to display the data and refresh the values depending on the defined Refresh Period.