


|
OneTick Cloud
The OneTick Cloud connector allows access to historic market data with no software dependencies by using the OneTick Cloud and their web API to retrieve data.
Using OneTick
-
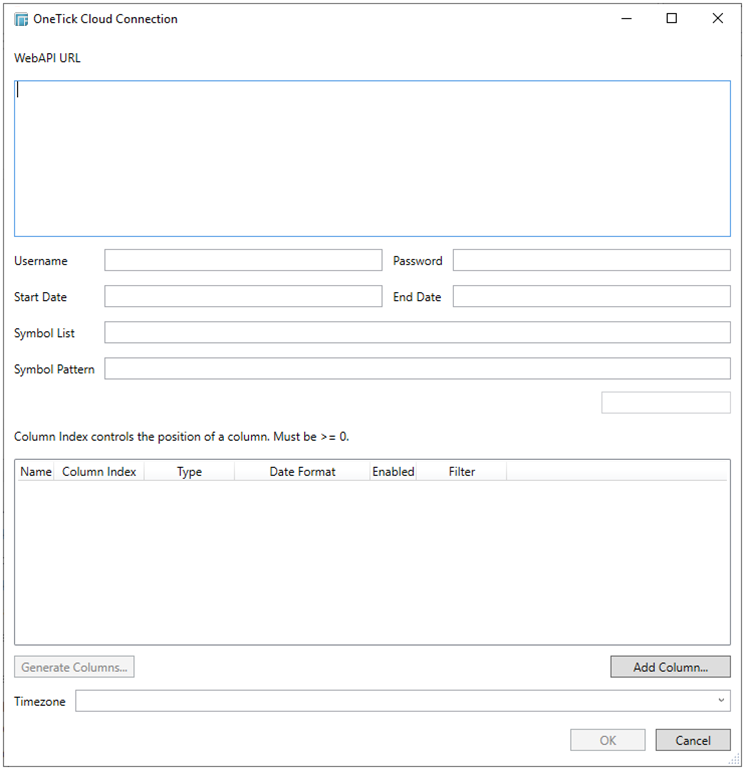
When creating a new data table, select OneTick Cloud from the Connect to data dialog. The OneTick Cloud Connection dialog is displayed.
-
Enter the OneTick Cloud WebAPI URL into the WebAPI URL box with the following format:

Where:
-
-
s, e, timezone – the start and end time of the query YYYYMMDDhhmmss form. The timezone used to interpret this value is taken from the timezone parameter.
-
response – the supported response format is csv.
-
compression – if available, this option enables gzip compression of the results stream. Large data should always be pulled with compression on.
-
-
Enter the Username (email) and Password to execute the query and retrieve the data. Note that the Username is case sensitive.
-
Enter the time window Start Date and End Date.
-
Enter the Symbol List. This value filters the query output with matching symbols.
To make it work, ensure to include Symbol in the Query URL. Consequently, the data will be filtered out for the input (Symbols) provided in the Symbol List field.
-
Enter the Symbol Pattern. This value filters the query output with the data for all the symbols with matching pattern.
To make it work, ensure to include Symbol_Pattern in the Query URL. Consequently, the data will be filtered (for all the Symbols) with matching pattern provided in the Symbol Pattern field.
-
For column creation, you can opt to do any of the following options:
-
-
Click the Generate Columns button. This will query the OneTick Cloud for the first few records and attempt to build your table schema from that information.
-
-
-
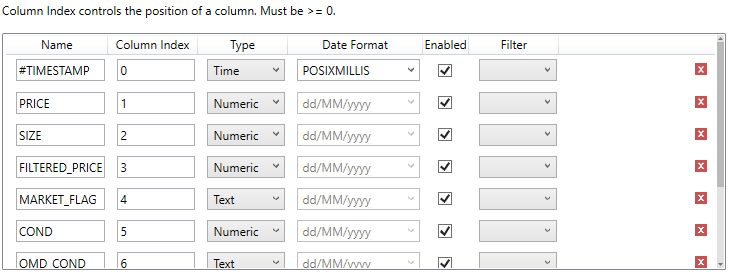
Click the Add Column button. A new row displays in the Text list box. Enter the necessary information for each column.
-
This drop-down list box specifies if fields are enclosed by text qualifiers, and if present to ignore any column delimiters within these text qualifiers.
Click  to delete
a column in the list. Then click OK in
the confirmation message that displays.
to delete
a column in the list. Then click OK in
the confirmation message that displays.
-
The time zone of input parameters and output data is by default unchanged. Changing the time zone is supported through the Timezone list box, based on the assumption that data is stored in UTC time and outputs are presented in the selected time zone.
Likewise, the time zone can also be parameterized.
-
Click OK. The source table is returned in the Edit Data Table view, with the title and the fields displayed in the Data Source Preview.