


|
MS Excel
This is the most commonly used data connector when prototyping, and is used for retrieving data from Excel workbooks or spreadsheets, where for each selected sheet, the first row contains the field/column names, and subsequent rows contain the data.
When in use by the Panopticon Designer (Desktop), the Excel spreadsheet file is queried locally and no copy is made. However when the workbook is published, the spreadsheet will be copied to the Panopticon Visualization Server, effectively creating a snapshot of the data on the server. This is because the server does not necessarily have access or permissions to the source file location.
NOTE: In production use, it is not advised to use a single Excel file as multiple Panopticon data sources. This is because, when using the same Excel file with the data on several sheets, conflicts may occur in reading the file.
A workaround could be to set up a Data Extract with scheduled refresh for each of the datasets in the Excel file, and then let the data tables in your workbook load the data from the Data Extracts.
Using MS Excel Spreadsheets
-
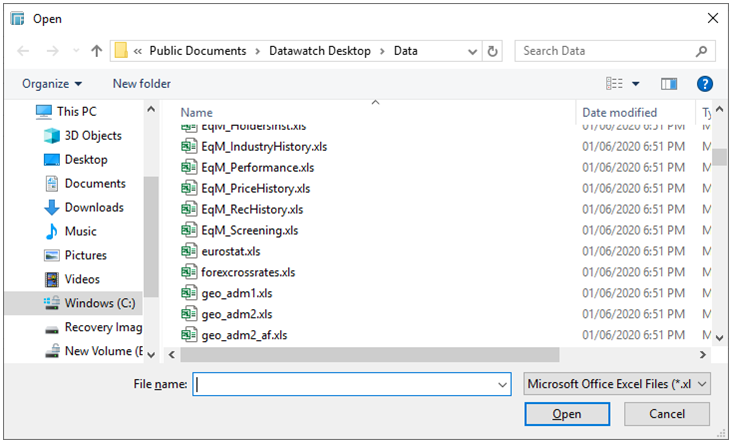
When creating a new data table, select MS Excel from the Connect to data dialog. The list of Excel files is displayed.
-
Browse and select the required Excel file, which can have these file extensions:
-
-
XLS
-
XLSX
-
XLSM
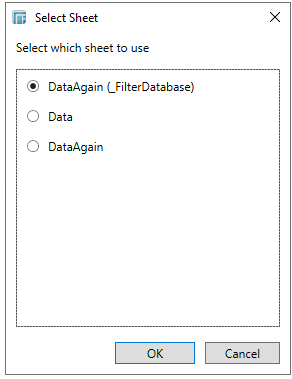
The Select Sheet dialog is displayed.
-
-
Select the required sheet.
-
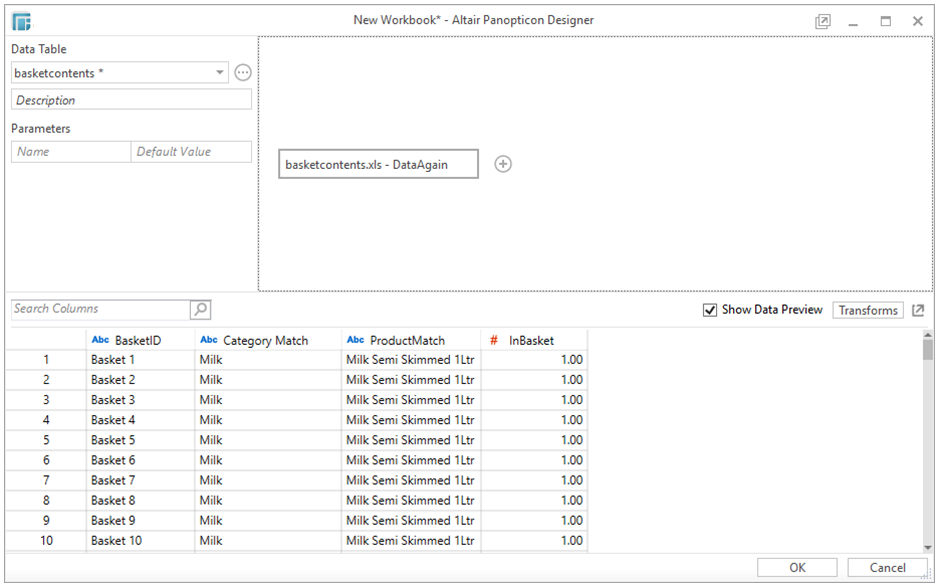
The source table is returned in the Edit Data Table view, with the Excel workbook and sheet name as the title, and all fields displayed in the Data Source Preview.
-
Click
 in the data source box.
The Data Source Specific Settings dialog displays with the following information:
-
-
Source File Location
-
Required Sheet
-
Enable real-time check box
-
-
Click
 in the Data
Preview area. The Datasource
- Transforms dialog displays with the following information:
in the Data
Preview area. The Datasource
- Transforms dialog displays with the following information:
-
-
Pivot
-
Unpivot
-
R Transform
-
Python Transform
-
Time Series Transform
-
-
Click on a field drop-down in the Data Preview area to:
-
-
Modify the data types.
-
Select which fields to include or duplicate.
-
Change the display Titles.
-
Define the display formats for numeric fields. The default setting is: #,##0.00
-
Define new auto-generated Key column, calculated column, or grouping column
-