


|
Business Objects Universe
The Business Objects Universe connector allows you to connect to your SAP Business Objects Universe.
Using Business Objects Universe
-
When creating a new data table, select Business Objects Universe from the Connect to Data dialog.
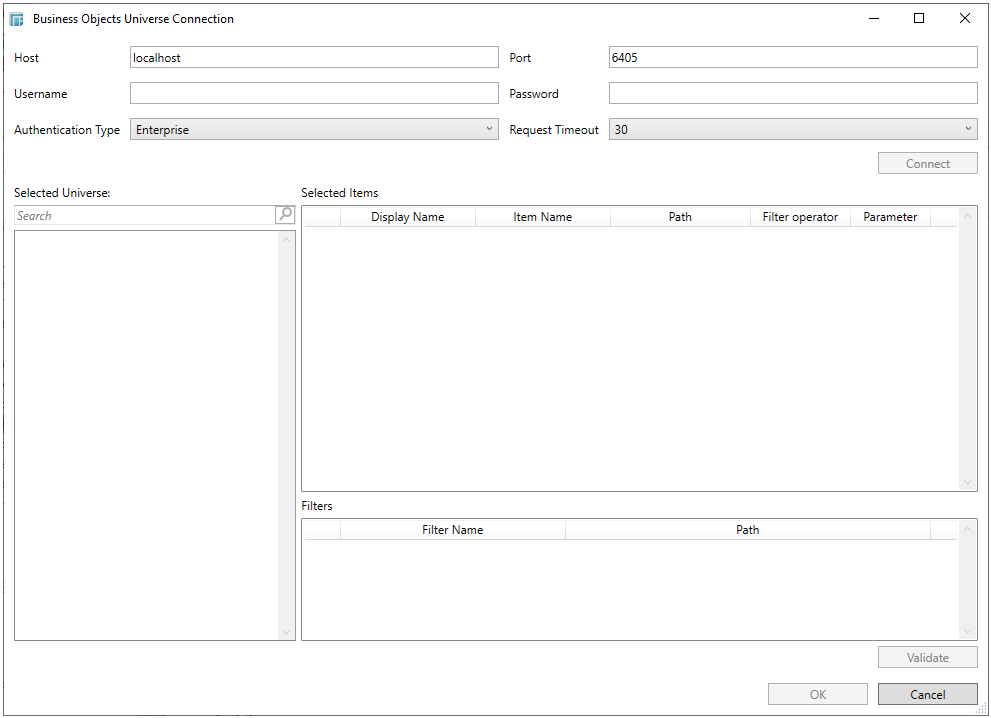
The Business Objects Universe Connection dialog displays.
-
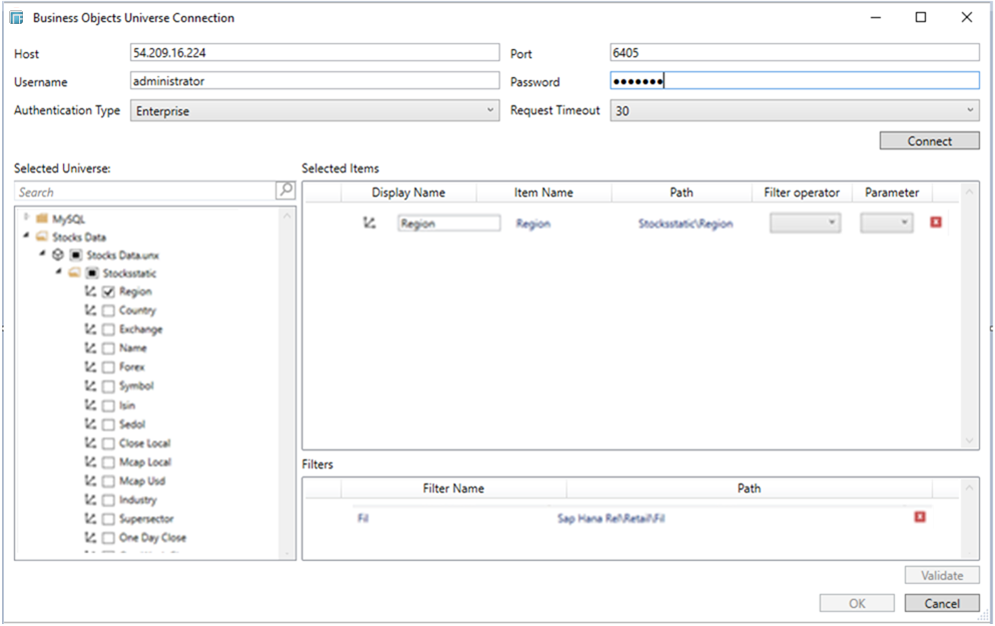
Provide the hostname, port, user ID, and password required to connect to the Business Objects Universe. If the port you wish to use is different from the default port, change the default value to the correct one.
-
Select any of the following Authentication Types:
-
-
Enterprise
-
LDAP
-
WinAD
-
SAPR3
-
NOTE: This list depends on what auth providers are available for the BOU instance.
-
Set the Request Timeout. 30 is the default.
-
Click Connect to load the selected Universe. The directory path where the selected Universe is placed on the BOU server is displayed beside the Selected Universe label.
In the treeview of the loaded items, the following element types are displayed:
-
-
Folder
 or
or 
-
These are the logical groups of related objects.
-
-
Universe

-
Maps to the data in the database.
-
-
Dimension

-
Key objects to which queries are based on.
-
-
Business View

-
These are semantic layers specific for Crystal reports.
-
-
Filter

-
Used to limit the data that is returned.
-
-
Attribute (similar to Calculated columns)

-
-
Perform quick searches for universes, measures, and dimensions in the Search box.
NOTE: Only the previously loaded subtrees can be looked up via quick searches when sub-trees are fetched on-demand.
-
All of the selected items in the treeview are listed in the Selected Items box.
-
You can modify the Display Name of an item. Also select a filter operator and parameter or delete an item in the list.
-
The selected table with filters is displayed in the Filters box. These are stored in the Business Objects Universe.
NOTE: BOBJ (Business Objects) supports specifying custom filters either in the Filter box or a parameter can be set for any added Item in the Selected Items box.
There is also a separate list for BOBJ predefined filters that you can use.
-
Click Validate to validate the query in demand.
-
Click OK to confirm the selection, auto-validation of query, and retrieve the record set into Panopticon Designer (Desktop).
The flat record set corresponding to the executed SQL is returned from the source database and displayed in Edit Data Table view with the database name as the title and all fields listed displayed in Data Source Preview.
-
If you wish to make changes to your fields, you may do so now and then click OK when you are finished. If you do not wish to make any changes to your data, simply select the OK button.