Global morphing differs from local morphing in that there are no definite boundaries
between the handles that restrict their zones of influence. When you perform global morphing
operations, the parts of the model that are morphed are those that lie between the handles that
are moving and those that are not.
For the general space frame cases, positioning handles at the joints between the members of
the space frame restricts the handle influences to the parts of the frame that they are
touching. However, for cases where you are trying to morph a mesh that covers a wide area, you
will need to place several handles across both of sides of the zone of influence.
You can visualize the handles as places on a sheet of rubber where you are placing your
fingers. If you place three fingers on one side and two on the other and try to stretch the
sheet, the space between your fingers on the two finger side will be pulled towards the three
finger side. By placing three fingers on each side, you allow for even stretching to occur
between each set of fingers. In morphing this is accomplished by placing handles evenly along
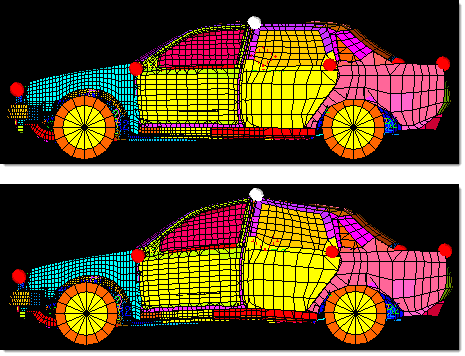
both sides of the mesh to be stretched. Figure 1. Control Global Morphing with Handles. The handle on the roof is moved upwards and the center section of the car is morphed
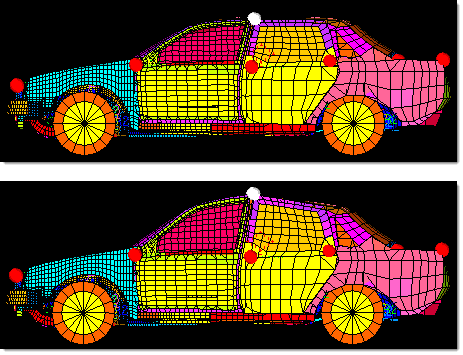
along with it. Figure 2. Control Global Morphing with Handles. A handle is added directly below the handle on the roof near the center of the car.
Now when the handle on the roof is moved upwards, only the part of the car between the
roof and the handles along the midline of the car is stretched.
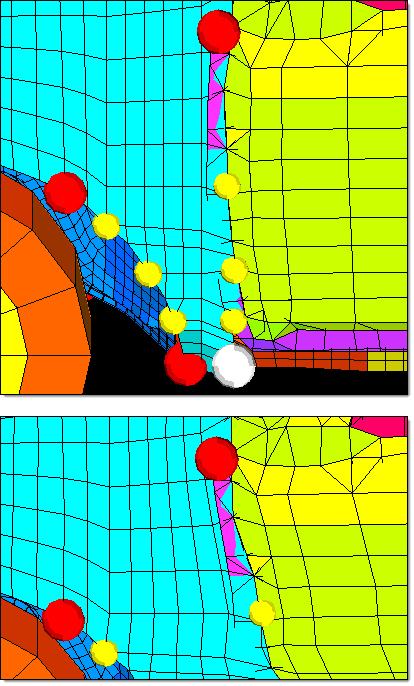
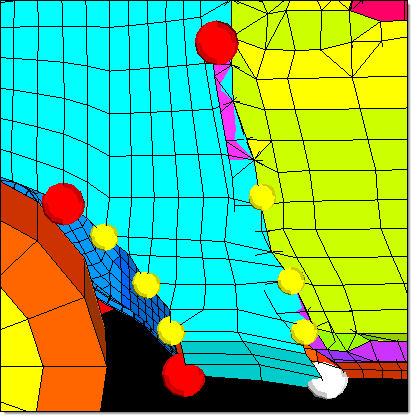
Figure 3. Add Handles to Control Global Morphing. Using several handles on either side, the fender of the model is morphed. Note that
dependent handles are used to simplify the morphing operation. Also note that in cases
where detailed shape changes are required, morph volumes will usually yield better
results.