Exporting Mesh to Gerber Format
A Gerber mesh is typically used in printed circuit board industry software, for example, to describe the printed circuit board images such as copper layers, solder mask and legends.
When exporting planar structures to Gerber format, all entities are projected onto the XY plane.
If a model outline is required, use CADFEKO wires as the wires are exported as zero width wires.
-
On the Home
tab, in the File group, click the
 Export icon. From the drop-down list select the Mesh icon. From the drop-down list select Gerber mesh
(*.gbr).
Export icon. From the drop-down list select the Mesh icon. From the drop-down list select Gerber mesh
(*.gbr).
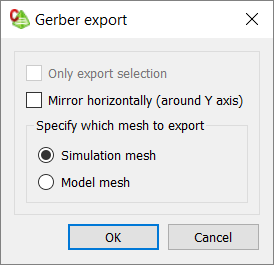
Figure 1. The Gerber export dialog.
If a geometry part or mesh part was selected in Step 1, the Only export selection check box is selected.
If the model contains mesh parts (imported meshes) and simulation meshes (meshed geometry or remeshed mesh parts), the options under Specify which mesh to export are enabled.