WallMan offers a powerful group manager to handle especially
large databases very easily. Groups are simply a combination of several walls. Groups can
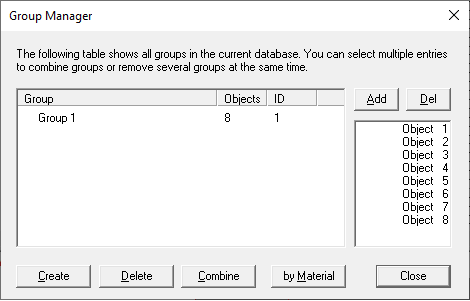
have subgroups. The group manager can be opened by selecting Objects > Group Manager.
Figure 1. The Group Manager dialog.
In the tree view on the left-hand side, all groups in the scenario are shown. If a group is
selected in this tree view, all objects belonging to this group are shown in the table on
the right. The buttons in the middle of the dialog are used to modify the groups.
Note: Be
aware of the delete function: Walls are not removed with the button
Delete, only the combination (grouping) of the objects is
removed.
The Combine button is used to combine several
groups (coequal groups, subgroups, parent groups) to one new group. With the
Rename button, the selected group will be renamed. The
Create function is used to generate a new group from all selected
groups.
The button Group Walls by Material will create groups with respect
to the material properties of the walls.
There are also buttons on the toolbar available to use the grouping features:
First, you must select multiple objects by clicking on them in any of the
three 2D-views and holding the Ctrl key. When you have selected the objects,
you want to become a group, then click the group icon on the toolbar.
To disintegrate a group simply select one object of the group and click on
the ungroup icon on the toolbar.